BEARDED DEVIL

Monsters, Horror, Gaming

St. Severine’s Skull: Hexenburg Castle – Gatehouse Dungeons

Dungeons

Soundtrack

This series of chambers connects to the catacombs, cistern, and barrow.  Grugnar uses them as his “workshop.”

GD1 – Trapped Passage

Down the stairs, you find a grimy stone hall that runs ahead for some distance into the subterranean gloom.  The spell of spoiled meat is very strong here.

Fortitude save DC 10 or be Sickened by the stench (-2 penalty on attack rolls, weapon damage rolls, saving throws, skill checks, and ability checks) while remaining in the gatehouse dungeon (new save required upon re-entry).

Grugnar has set a vicious trap here for those trying to descend into his lair.  A gut tripwire is suspended across the corridor.  If tripped, a sharpened battering ram on the ceiling swings down to hit characters.  Perception DC 20, Disable Device 20, Attack +15 (2d6+4/x4).

GD2 – Anteroom

A disgusting mass of tattered, rotting skins, broken bones, mutilated organs, and other castoff bits and pieces is heaped high in this room, attracting swarms of flies.  A few rats nibble on the putrescent remains.

GD 3 – Dining Room

A large table and a chair made out of whittled human bones and lashed together with intestines can be found here.  Both are sized for a very large creature – the table is quite high, and the chair large enough to seat someone at least eight feet tall.

GD 4 – Mask Chamber

This might once have been a cellar or storage chamber for the gatehouse, but it’s been converted into some kind of grotesque display room.  Covering the walls of the room are masks – dozens of them – made from flayed humanoid faces.  The skins have been heavily stretched and even patched with other pieces of skin to make them larger.  Heaped in a corner of the chamber is a greasy pile of humanoid hair.  Looking closer, you see it is actually a pile of humanoid scalps sewn together with the hair still on – crude wigs.

GD5 – Tannery Room

An extensive series of vats and racks are arrayed here – it looks like tanning equipment, used to turn hides into leather.  Knives used to scrape hair from flesh are scattered about on the floor.

Anyone who wants these used tools can get a tanner’s kit.

GD6 – Flensing Room

This room is some kind of filthy workshop.  Crates and tables have been arrayed here as makeshift work-surfaces, and a vast array of blood-stained knives, bone-saws, pincers, tongs, hatchets, and other bladed tools are evident.  On one table rests a partially flayed corpse, that of a human man.  Judging from the brands on his un-flensed palms and his split nose, the man was a criminal of some kind.

Any of the surgical tools could be used as a weapon equivalent to a dagger or short sword.

GD7 – Wardrobe

This chamber must once have been a storage room for salted meat or the like, judging from the rusted meat-hooks which dangle from the ceiling.  Instead of cured pork, however, the meat-hooks are now hung with monstrous garments made out of human skin.  Judging from the differing pigmentations evident on these patchwork suits, each was made from multiple people.  The garments are very large, as if made for someone much bigger than a normal humanoid.

GD8 – Trapped Passage

This passage reeks of mildew and stagnant water, and you can hear a dripping sound up ahead.

It’s also trapped with a rusty iron portcullis, part of the original fort to help block off any enemy miners, which Grugnar has converted into a makeshift trap.

GD9 – Cell Block

A long hall lined with rotting wooden doors stretches before you.  Metal slats on the doors allow a gaolor to look into the cells beyond.

GD10 – Cell

Dungeon

You can hear muffled moans from inside the adjoining chamber.

The door to this room is locked (DC 20 to pick, DC 22 to force).  Grugnar’s key opens it.

Chained to the far wall of this small, dirty cell is a young man in a monk’s habit, his head tonsured into a double crown, his robes filthy and streaked with blood.  He is praying loudly, but as he sees you, his eyes widen.

“My prayers have been answered!” he proclaims.  “I knew I would be delivered from this hell…”

This is Brother Ambrose a young priest-in-training who, along with his master, Father Umberto, and a Knight, Sir Albrecht, came to the Castle after hearing of its chapel and the holy club, known as the Hammer of Redemption, said to be interred within – a weapon said to have been wielded by the crusader Sir Arngrim, who reputedly used it to slay a hundred heathens in the Winter Crusade.

“We came to Hexenburg in search of the Hammer of Redemption, the Holy Cudgel – Father Umberto and I, and Sir Albrecht.  Before we could reach the chapel the Goblins and their demon-wolf leapt out at us, dragged Sir Albrecht back to their den.  The Father and I fled, but then that thing – that fiend that clothes itself in human skin – hit me over the head.  I’ve been here ever since.  I think it’s fattening me up – it keeps trying to feed me.”

Brother Ambrose will join the party to try and find Father Umberto and Sir Albrecht.

GD11 – Empty Cell

This small, square chamber is empty.  Some manacles dangle from chains attached to one wall, suggesting this is a cell.  Old bloodstains cover the floor, and there’s a small drain at its center.

There’s a secret door here, leading to the Barrow.

GD12 – Tapestry Room

Someone has draped the walls and floors of this disused storage chamber with disgusting wall-hangings and carpets made from poorly tanned human hides, some of them stitched together into revolting patchworks.

GD13 – Wine Cellar

This large cellar-chamber is stacked high with old barrels, though by now any wine they contain will be hopelessly sour.

A purely empty room, although a great place to hide.

GD14 – Collapsed Tunnel

This tunnel ends in a collapse – the ceiling has caved in, blocking the path.  There’s a narrow aperture near the base of the collapse where a child or small humanoid might squeeze themselves through to the other side.

Small creatures can squeeze through the cave-in, but it takes a DC 20 Escape Artist check to get unstuck at one point.  The perfect point for Grugnar to attack…

GD15 – Trapped Passage

The stones of this passage have changed in quality – where before the tunnels were of dressed stone, now they are simply hewn from the rock, perhaps suggesting that the dungeons ahead are older than the ones you just explored.

There’s another tripwire here, again DC 20 to spot and 20 to disable.  It releases two mace-heads on chains that have been smeared with centipede poison: +10 to hit each, 1d8+2 damage each, plus poison (Fort DC 11, 1 Dex damage, 1/round for 4 rounds, 1 save cures).

GD16 – Forsaken Shrine

A pair of stern stone doors graven with images of winged figures stand here.

The stone doors are shut (DC 25 to force open) but can be opened with the Winged Key.

A thick layer of dust carpets this cavernous, pillared hall, its walls and floor graven with thousands of tiny sigils, mostly obscured by the dust.  Halfway across the floor there’s a groove that bisects the chamber into two halves.  At the far end of the hall looms a massive stone statue in the shape of a prodigious bat-like horror, a monstrous, quasi-humanoid idol with tenebrous wings spread from wall to wall, its toothy maw gaping blackly.  Empty braziers and torch sconces are evident, and there’s a cobwebbed altar at the bat-god’s clawed feet.

This old Imperial shrine – dedicated to the bat-god Ikellus, a deity of nightmares, prophetic visions, transformation, and blindness – Knowledge (religion) DC 20 to recognize this obscure deity.  There is nothing of value here, but there is in the hidden chamber at the back of the hall (Perception DC 20 to locate – a torch-sconce, when adjusted, opens the door).

Anyone who brings any of the contents of the hidden chamber across the ominous line bisecting the temple activates a magical trap (DC 30 to discover or disable):

A horrible, high-pitched shrieking sound fills the chamber, echoing off the walls and pillars, emanating from the stone jaws of the bat idol.  The black mouth of that twisted statue vomits forth a shadowy torrent, a fluttering swarm of leathery bodies – bats by the hundreds, swirling out of the idol’s maw and flitting towards you!

The idol spawns a Bat Swarm once per round until the character who stole the item returns across the line or until the thief is dead.  Swarms linger if the objects are returned but return to the idol’s maw if the thief is killed.  The shrine can hold a maximum of 12 swarms, but if a swarm is killed a new one spawns in its place the next round.  Short of destroying the idol the only way to escape is to seal the bats inside the room by shutting fast the stone doors.

GD17 – Hidden Chamber

Beyond the secret door lies a small vault where holy objects sacred to the shrine are stored; these artefacts must have lain undisturbed for centuries.  Most are nothing more than ceramic ewers and cups painted with glyphs or symbolic figures, but some of the goblets are of silver, inset with onyx gems.  There’s also an ornate ritual mask, metal, forged in the semblance of a bat’s twisted visage.

There are 6 silver cups set with onyx gems, worth 100 gp each.  The Mask of the Bat, when worn, causes its wearer to become Blind grants its wearer Blindsight for 40 ft. as if they were under the effects of an Echolocation spell.  It also allows its wearer to use the spell Ear-Piercing Scream once per day with a caster level equal to their level.  It is worth 3500 gp.

Witiko Falls

Overview

The following comprises campaign information and scenarios for a sandbox-style surreal horror game set in the superficially normal town of Witiko Falls.  The campaign format is intended to combine elements of a horror one-shot with the openness of a sandbox game in a kind of “small town horror anthology.”  The idea here is that each session or two the players will pursue one of the many plot threads within the town.  Their characters are very likely to die in any given session, but new characters will appear in the next session; only the town remains constant.  The players assume the role of outsiders entering Witiko Falls for the first time.  They might be conspiracy enthusiasts, lost travellers, drifters, private investigators, bumbling tourists, campers, touring musicians, or even a family moving into town.

GUMSHOE (especially Fear Itself or Esoterrorists), BRP, Fate, d20 Modern, and similar systems are all viable candidates for running a game set in Witiko Falls.  Personally I’m going to run games using the GUMSHOE system as represented in Fear Itself, so I will assume that system is being used, but this assumption won’t often intrude on setting details.

Witiko Falls

Rockies

A remote community hidden in the depths of the Rocky Mountains somewhere near the convergence of the Idaho, Montana, Canadian borders, Witiko Falls was established as a scenic health resort in the 1880s.  Over the last few decades of the nineteenth-century the town became a popular destination for the rich and sickly, resulting in the founding of numerous sanitaria, insane asylums, spas, and other health facilities, a number of them making use of the local hot springs and caves nearby.  The town enjoyed a period of prosperity and growth until 1920s, when it went into a slow decline and began to garner an unsavoury reputation after a series of bizarre incidents and disappearances.  The Great Depression catalysed the closure of many sanitaria during the early 1930s, including the famous “Crow Castle” in 1933.  With these closures, many left the town, and its population dwindled till only a few eccentrics called the place home and the forest began reclaiming the old facilities.  Witiko Falls was well on its way to becoming a true ghost town when members of a U.S. Federal Government agency (which agency, exactly, remains uncertain) arrived shortly after the end of WWII and refurnished the Castle for purposes they have never disclosed to the public.  The little-known town is now home to a few thousand souls, a friendly but somewhat secretive folk who largely ignore the brooding presence of Crow Castle, its mysterious occupants, and the unmarked vehicles that periodically pull into its wrought-iron gates.  Few come to the town, now, save the very occasional tourist, lost travellers looking for the road to Coeur d’Alene, gamblers heading to the Beavertail Casino, spelunkers hoping to explore the caves, and members of a small cabal of ghost-chasers or conspiracy theorists who believe the town is “the Roswell of the Northwest”; all but the lattermost are shyly welcomed by the hospitable (if inscrutable) locals.

Tone

Witiko Falls seems normal, but this appearance is but a layer of banality sitting atop a vast reservoir of roiling eldritch horror like the skin on a glass of old milk.  Something squirms beneath the flesh of the town – some old unpleasantness, always lingering at the edge of vision, embedded deep in the place’s tissues like a tick. It makes you itch, makes the hairs on your arms stand on end.  It gives you a knot in your stomach.

The ideal tone to cultivate is one of subtle but definite wrongness.  Little, seemingly innocuous (but still unsettling) details should conspire to create an atmosphere of paranoia and queasily mounting dread.  The players should always feel that something is just a little bit off, without being able to point, exactly, to the source of all the ambient oddness.  Each adventure should consist of a series of glimpses, whiffs, intimations of some colossal and nameless ugliness, some elemental strangeness at the heart of the town – culminating, ultimately, in a brief but spectacular explosion of visceral horror of immense power, hitting players like a punch to the stomach.  Be restrained, but then really let loose…

Influences

Outlast, Silent Hill, Fringe, Twin Peaks, Buffy the Vampire Slayer, Gormenghast, House of Leaves, Welcome to Night Vale, The Shadow Over Innsmouth, Books of Blood, Slithdale Hollow.

Soundtrack

Twin Peaks Soundtrack

Fire Walk With Me Soundtrack

The Fog Soundtrack

Fringe Soundtrack

The Shining Soundtrack

Nightbreed Soundtrack

Hellraiser Soundtrack

Red Dragon Soundtrack

Outlast Soundtrack

Call of Cthulhu Soundtrack

Silent Hill 2 Soundtrack

Phenomena

The town of Witiko Falls may seem relatively normal on the surface, but those who linger begin to notice a number of unsettling phenomena.

Anisocoria

Everyone native to Witiko Falls is afflicted with anisocoria – they possess differently sized pupils.  All those born in the town, regardless of ethnicity or background, suffer from this (harmless) condition.  It seems to become more severe with each passing generation: a second-generation resident of the Falls, for example, has a greater disparity in pupil size than a first-generation native.  The affliction is known as the “Eyes of the Witiko.”

Parasomnia

Visitors to Witiko Falls often seem unable to obtain a good night’s sleep.  Many of those who first arrive in the town immediately begin suffering from some form of parasomnia, even when they have no prior history of sleeping disorder.  The most common include night terrors, sleep paralysis, somnambulism, and somniloquy; sexsomnia and sleep-eating have also been known to manifest.  Even those who avoid such symptoms tend to suffer from nightmares and especially vivid dreams on first arriving in town.  In particular, new visitors tend to dream of happy childhood memories, memories horrifically marred by the presence of shadowy “things” watching from just outside of the dreamer’s peripheral vision; sleepers will inevitably wake moments before finally properly glimpsing those watching them in their dreams.  This condition persists for a variable amount of time, sometimes never fully dissipating, although natives of the town seem to sleep soundly enough.

Batteries

For unknown reasons, batteries only last half as long in Witiko Falls.  This phenomenon is one of the few associated with the town that can be consistently and quantifiably documented.  Laptops, cellphones, flashlights, and other battery-operated devices all drain their batteries at double the normal rate.  All other electronic devices perform completely normally, unless one counts the television program The Ritualist.

The Ritualist

A television program that seems to be exclusively broadcast in Witiko Falls.  The extremely campy show features an occult detective similar to literary figures like John Silence, Thomas Carnacki, Simon Iff, Steve Harrison, Harry Dresden, and other supernatural investigators, and is comparable to similar programs such as Baffled! and The Night Stalker.  The program seems to have been made in the 1970s, although some episodes make references to events that occurred in the 80s or even later.  The eponymous Ritualist is Felix Mortimer, a hardboiled American detective who deals with supernatural crimes.  Most of Mortimer’s cases take place in a fictitious east-coast city named St. Lazarus, though episodes also take place in a range of other locales including London, Cairo, Istanbul, and Shanghai.  Extremely episodic and formulaic, The Ritualist is never broadcast in order, although it would be difficult to discern the correct order in any event.  The program is (apparently) syndicated and appears on multiple channels in lieu of regularly scheduled content.  TV guides do not mention the program, but it is available through on-demand and subscription services accessed within the town.  As far as can be ascertained, the program has not been broadcast outside of Witiko Falls, no record of its production or broadcast has been found, and none of the actors have been located.  Those few DVDs and videotapes of the show taken out of Witiko Falls eventually fail to play properly once they have left the town limits.

Roads

It is unclear whether the roads around Witiko Falls constitute a manifestation of its peculiar nature or not.  The area around the town is a mass of logging roads and disused back-country roads, and finding the town can be difficult even for those who have made the trip multiple times.  Locals can usually give coherent suggestions on how to leave the town, but periodic flooding, downed trees, broken bridges, and other obstacles can complicate travel to and from Witiko Falls.  Gravity hills and other optical illusions also pervade the roads, complicating navigation.  Not every trip is difficult; it has been observed that those who aren’t looking for the town seem the most likely to find it.  Satellite photography of the area is often curiously obstructed by atmospheric interference and technical malfunctions, and most maps of the roads are outdated and unreliable.  Some conspiracy theorists maintain that the roads move around to “protect the town.”  When asked about this phenomenon, some residents will chuckle and concede half-jokingly that the roads “have a will of their own,” but always do so with an ambiguous wink or a sly smile.  Some truckers have reputedly collected certain “tricks” to reach the town, which they sometimes use as a rest stop.

Animals

Non-human mammalian animals do not fare well in Witiko Falls.  Dogs, cats, horses, and other creatures have been known to exhibit behavioural changes, anxiety, aggression, and bouts of illness in the town.  Most blame such symptoms on altitude sickness.  Non-mammalian animals seem unaffected.  There is a pet store in Witiko Falls, but it only carries birds, fish, and reptiles.

Instructions

Periodically, residents and sometimes even visitors in Witiko Falls will receive anonymous instructions, usually in the form of letters, cryptic voicemail messages with disguised voices, text messages, or emails.  Such notes always insist that their contents and even existence should be concealed from others.  The instructions vary wildly in character but usually ask the recipient to perform some innocuous or trivial task, such as going to a certain cafe and ordering a particular drink, leaving a cold tap running in a public bathroom, turning a picture so that it’s askew in a hotel lobby, taking out a certain book from the library, or leaving a doughnut in a paper bag on a specific park bench.  The writer addresses the notes to “Agent X,” X being the surname of the recipient.  The tone is always one of intense urgency and secrecy, and the writer never reveals anything about the greater context or consequences of such activities.  Very rarely, the messages will not be mundane at all; recipients will instead be instructed to perform some hideous, unwholesome, or even violent act.  The space of time between instructions is unpredictable, ranging from hours to years.  Most residents of Witiko Falls never acknowledge the existence of such instructions and will plead ignorance if confronted with them.

Locations

Here are but a few of the many interesting locations to be found within the town.  This is just an overview; each location (and whatever secret strangeness it might conceal) will be detailed much more exhaustively later.

The Falls

Crystal Falls

The Witiko Falls themselves are reputed to have powerful healing properties, properties which initially drew the sickly to the town to bathe in or drink from the Falls’ waters to cure their ailments.  Indeed, the original form of the town was little more than a cluster of tents erected around the Falls.  Spilling out of the mountains not far from Crow Castle, the Falls feed the Green Lady River and joins the Kootenai River, itself one of the uppermost tributaries of the Columbia.  The Falls also serve as a kind of hidden entrance to the cave-system that runs beneath and around the town; though there are many other entrances as well, this is the best known.  Sleepwalkers plagued by the parasomnias that frequently afflict newcomers to the town often find themselves curiously drawn to the Falls themselves and are frequently discovered standing stock-still (sometimes having waded out into the river) apparently staring at the Falls in silent contemplation.

Crow Castle

First constructed by Sebastian Corvus, a wealthy but eccentric mystic and member of the Hermetic Order of the Golden Dawn, Crow Castle is a massive, rambling mansion built in the hills overlooking Witiko Falls.  Corvus – a somewhat decadent British occultist – journeyed to the Falls after hearing legends of their healing properties, hoping to cure himself of an unknown illness (almost certainly syphilis).  Financing construction of the huge, variegated house in 1886 using his family fortune, Corvus appeared to recover from his sickness but later contracted tuberculosis.  After undergoing a deathbed conversion he willed the entire estate to the Sisters of Penitence, the so-called Red Nuns or Red Sisters.  Following Sebastian’s death the Sisters converted the house into a lavish sanitarium for consumptives.  It remained a popular destination for sufferers of the disease until its closure in 1933.  The Sisters continued to operate a small portion of the house as a school for girls for another six years before the house was condemned by inspectors as unsafe.  Unable to pay for repairs, the Sisters quietly sold the land to the federal government.  Crow Castle itself is an enormous, curiously variegated building exhibiting features from dozens of different architectural styles.  Broadly speaking the place resembles the Gothic follies and Romanesque Revival mock-castles more commonly found in Europe during the nineteenth-century, but parts of the Castle exhibit radically different styles – notably the sphinx-encrusted Egyptian Wing, the Arabesque Rooms, and the Byzantine Tower.  Extensive cellars, basements, and tunnels can be found beneath the Castle, some of them reputed to connect to the caves that riddle the area.  As for the shadowy government officials that have operated Crow Castle since 1946, little is known.  They’ve repaired and reinforced most of the Castle – or, at least, most of its exterior – and keep a heavy watch, though their actual agents are only rarely glimpsed.  Apart from the unmarked trucks and helicopters that periodically make stops at the Castle the only signs of activity are the glimmer of lights from its windows and, very rarely, indescribable noises that awaken the townsfolk in the dead of night.  The locals themselves prefer not to speak of the Castle or its dark-suited occupants.

The Swiner

An all-night diner built in 1924, the Swiner is a novelty diner in the shape of a gigantic piebald pig, with windows for eyes, a gaping mouth for a front door, and more windows along the pig’s long body, as well as a rudely positioned back door.  The diner, naturally, specializes in pork products, particularly bacon-based meals; its signature dish is the bacon-wrapped meatloaf called the Crispy Piglet, although their pork sandwich, the Slaughterhouse Five, containing pulled pork shoulder, bacon strips, spareribs, smoked ham, and a pork sausage, is also legendary.  Less extreme dishes include ham hocks, pig’s ears, crackling, pork belly, and tenderloin, though they also have a small selection of beef and chicken dishes and a single vegetarian option, a grilled cheese sandwich.  The place is owned and operated by a pair of twins, Daphne and Gertrude; the two are identical tall, solidly built woman (the term “brick house” has been thrown around) who change their hair colour on a regular basis.  They are distinguished by their tattoos: Daphne sports the head of a Rottweiler on her left shoulder, Gertrude an English Bulldog on her right.  The diner has been in continuous operation since it was built, one of the few businesses to survive the Depression and the mid-century slump in Witiko Falls’ fortunes, and the Swiner Twins claim to still use the original recipes created by their German great-grandmother, a first generation immigrant.  Forming something of a community gathering-place, the Swiner is a popular hangout for adolescents attending Witiko Falls High School, as well as truckers and locals.

The Burning Bush Gentleman’s Club

Witiko Falls’ only remaining night-spot apart from the Beavertail Casino is the Burning Bush Gentleman’s Club, a seedy roadside strip-joint with a gimmick – all the dancers are natural redheads, or so they claim.  Why this is so no one knows, although most suggest it’s due to the predilections of the cruel-eyed but jovial proprietor, Rakish Jack, a suave, pencil-moustached, oily-but-handsome man who favours black sharkskin suits.  The dancers all sport stage names that likewise pertain to the colour red in some way: there’s Scarlet, Strawberry, Rose, Carmine, Ember, Inferno, Autumn, Ginger, and Cherry (plus usually a few more).  The place has a series of back-rooms at least nominally for lap-dances, as well as a number of offices and other “Employees Only” rooms.  The joint hovers somewhere between sleazy and classy, its kitschy retro charm tarnished by the layer of grease and nicotine that seems to coat every surface.  Though most of the patrons are locals or truckers, the Burning Bush is also a frequent hangout for the Moonbrood, a gang of bikers whose clubhouse can be found further down the road.  They’re a raucous and somewhat unnerving bunch, but they actually tend to keep order more than cause trouble, kicking out those making a disturbance or bothering the girls.  Apart from the Casino and the all-night diner known as the Swiner, the Burning Bush is the only place open past midnight in Witiko Falls.

The Beavertail Casino

Built on a small scrap of Blackfoot land inhabited principally by members of the Kainai Nation (the “Blood Tribe”), the Beavertail Casino is one of the few businesses in Witiko Falls that can be legitimately described as thriving.  Grandfathered gambling laws have allowed the Native American operators to set up a proper casino here: sports betting, poker, blackjack, bingo, and slot machines can be found within, and in-the-know gamblers frustrated with the limited gambling options in Montana flock to the casino in search of a big win.  Along with conspiracy nuts and truckers gamblers make up a significant portion of the Falls’ visitors.  The Casino forms the lifeblood of the tiny Kainai Reserve, little more than a small village of fewer than a hundred souls that clings to the edge of Witiko Falls.  The Reserve itself once larger in the days of Witiko Falls’ prosperity.  During the height of the “Age of the White Plague” – Witiko Falls’ most prosperous period – the Reserve’s inhabitants traded extensively with the inhabitants of the tent city that sprawled around Crow Castle and the other early sanitaria.  Since their closure the place has dwindled, and now almost all of its inhabitants work at the Casino, save for Byron Black Plume, a cheerful old man who runs the Coffee Wigwam, a kitschy roadside coffee stand at the edge of the Reserve.  The sign of the Beavertail Casino depicts a beaver whose tail is the shape of a spade from a deck of playing cards.

The Clubhouse

The biker gang known as the Moonchildren or Moonbrood maintain a clubhouse outside of Witiko Falls, accessible down a rough dirt road well-rutted with tire-marks.  Heavy gates and a fence topped with barbed wire protect the clubhouse from intruders.  Reputedly a one-percenter outlaw gang, the Moonchildren have a few chapters scattered across the Pacific Northwest, but Witiko Falls is their original charter.  They took up residence in the town in the late 1950s and have been a fixture ever since.  The Club has a strict hierarchy signified by a series of patches portraying different phases of the moon, beginning with New Moon members, followed by Crescents, Quarters, Gibbous, and Full Moon members.  Like most outlaw motorcycle clubs they are almost exclusively male, but there are a few female members who sport a Red Moon patch.  A few members also sport a Blue Moon patch, marking them as members of the Cub’s leadership.  Mostly the Moonchildren (or “Mooners” as some locals call them – though never in earshot) deal weed to local kids and perform other petty crimes in the Falls and in neighbouring towns, though they may be involved in more serious crimes as well.  The majority of members have day-jobs elsewhere in the town.  The interior contents of the clubhouse itself are unknown to outsiders, but the Moonchildren have been observed assembling there at particular dates, especially during eclipses.  At any given time, however, half a dozen motorcycles can usually be spotted inside the clubhouse gates.  Out behind the clubhouse is a mysterious hole, called the Crater, which popular legend has it was created when a “piece of moon-rock” fell from the sky and landed in the forests.

Witiko Falls High School

The only secondary school in town, Witiko Falls High School has just under five hundred students, where once it had several thousand; consequently the entire north wing of the school has been permanently closed down.  In most respects the school seems like a perfectly normal American high school.  It has a football team, the Witiko Falls Kelpies; regular teachers teaching regular classes; a library, a field, a metal shop.  There are hints, though, of certain peculiarities.  There are several school clubs such as the Left-Handers, the Young Rosicrucians, the Pareidolia Club, and the Lucid Dreaming Club that seem somewhat unusual.  In lieu of a Homecoming Court or a Prom Court the students hold elections for figures such as the Satyr and the Nymph and representations of the Seven Virtues.  The library seems fairly normal until one begins to investigate the titles and discovers the complete works of the Marquis de Sade and an incredibly extensive collection of German fairy-tales.  Such strangenesses are dismissed by staff as nothing more than quirks of local custom and school tradition.

The Scarecrow Cinema

Formerly an opera house built in 1895 and known as the Cricket Street Theatre, the Scarecrow Cinema was reopened in the late 1970s after some vestige of life had returned to Witiko Falls.  Specializing in exploitation films, the Scarecrow is run by Mordecai Clay, a middle-aged albino film buff with a taste for the macabre.  The place is a huge, ill-maintained structure of incredible opulence, funded by the wealthy afflicted who once flocked to Witiko Falls for medical treatment.  Now the baroque foyer and halls are stained and dingy, as the cinema barely manages to cover its operating costs; word about town is that Clay is deeply in debt and in danger of bankruptcy, but remains stubbornly intent on keeping the Scarecrow operational.  These days it mostly shows old movies, second-run horror flicks, and even adult films, the latter sometimes patronized by drunken clientele of the Burning Bush who’ve been kicked out by the Moonchildren.  During Halloween the theatre is redecorated as a haunted house and local children are invited to explore dusty old rooms and halls, fake cobwebs blending with the real.  In recent years Mordecai has simply left the decorations up for most of the year, and so patrons lingering in the concession area may be surprised by animatronic ghouls and skeletons.

Whispering Cedars Hospital and Asylum for the Insane

Place Head Here

Apart from the consumption sanitaria, Witiko Falls also played host to a number of insane asylums and psychiatric hospitals, the largest of which was the Whispering Cedars Hospital and Asylum for the Insane.  The asylum closed its doors in 1953, a few years after the government assumed possession of Crow Castle, although the circumstances of its closure are somewhat mysterious; rumours swirl of unethical psychosurgery and experimentation, and of the intervention of the shadowy government agents that occupy the Castle.  Since its abandonment the asylum has become overgrown and dilapidated.  Vandals, drifters, squatters, and necking teenagers have since taken to lingering about the asylum’s fungus-eaten corridors.  Students at Witiko Falls High often dare one another to enter the old asylum, usually on Walpurgis Night or Halloween; consequently the asylum has walls covered with graffiti and carvings.  Old surgical tools, beds, and other medical equipment litter the forsaken operating theatres and wards, and adolescents dared to enter the place are usually charged with removing a scalpel, leather restraint, syringe, straightjacket, or similar object from Whispering Cedars as a trophy.  Known treatments practised in Whispering Cedars include hydrotherapy, thermotherapy, electroshock therapy, lobotomy and leucotomy, and similar treatments.  A number of suicides and disappearances have been associated with the asylum, only feeding the folkloric reputation the place has accrued over the years.  Whispering Cedars is also sometimes used by the Moonchildren as a meeting-place for drug deals.

(Photo credit: Justus Hayes)

The Compound

The headquarters of the splinter religious sect known as the Church of Christ, Cambion, the Compound, as it is usually referred to by those outside the cult-like group, can be found on the outskirts of Witiko Falls, built in and around the remnants of the St. Cyprian Lodge, a health resort and sanitarium that closed down shortly after the closure of Crow Castle.  The Compound is a heavily fortified structure complete with watch-towers, chain-link fences, and regular patrols.  The group are secretive about the specific goings-on within the Compound – which they refer to as the Fold – but actively proselytize and leave pamphlets about town, often in places of business and especially in the Burning Bush Gentleman’s Club, which they are reputed to own or have some other stake in.  Their beliefs are unique, incorporating aspects of Gnosticism, Theosophy, and Judeo-Christian Apocrypha, especially the Book of Enoch and its tales of the angels that fell in love with the “daughters of men.”  One of their chief claims is that Christ was sired not by the Holy Ghost but by the fallen angel Azazel in disguise; they believe that the angelic Grigori or Watchers who left Heaven are the true saviours of mankind, in contrast with God (“the Demiurge,” a cruel and uncaring tyrant) and Satan (“the Adversary,” who wishes to corrupt and destroy humanity).  As such they revere the Grigori as Promethean figures and their kindred – the Nephilim, or Cambions – as Saint-like figures and Christ in particular as a messianic hybrid.  Most of their materials, however, relate to the importance of love and emphasize that carnal love is never sinful, claiming books like Leviticus and other dogmas against fornication and deviance are nothing more than the Demiurge’s propaganda.  There are hints in their reading materials that their particular interpretation of the apocalypse will result in the creation of something they call the Land of Love.  The locals mostly dismiss the cultists as a bunch of slightly kooky but otherwise harmless nuts, and refer to the Compound as a “Hippy Love-Nest.”  Those passing by the road at night can confirm that the believers seem to be having a good time.  Members of the Church of Christ, Cambion have converted many of the old buildings into residences, shrines, and chapels, and also grow their own food inside.  The innermost structures of the Compound serve an unknown purpose.

The Cottage

An old log-cabin built deep in the woods north of Witiko Falls, the dilapidated lodge known as Fairbairn Cottage or simply “the Cottage” was the dwelling-place of a trapper and woodsman, Andrew Fairbairn, and his wife, Judith.  The full story of the pair can be read below (see Local Legends).  These days, the Cottage is a shunned and desolate place, uninhabited for many years.  Due to its extreme isolation it is sometimes used by teenage couples as a location for secret trysts.  Adolescents have been known to dare their peers to spend a night in the Cottage and carve their names in the old logs within, much as they urge one another to enter the Whispering Cedars Asylum.  Physically, the place is unremarkable – a simple two-room cabin with some rotten furnishings and animal pelts, a small root cellar, and the overgrown remnants of a garden (filled principally with hemlock plants).  No sign of Andrew Fairburn’s legendary black-wood chest or the scold’s bridle of legend can be found within, although a notched stump out behind the cabin does bear what look like axe-marks.

The Mountain Shadow Cemetery

The Mountain Shadow Cemetery is curiously free of the vague eeriness that pervades the rest of Witiko Falls, instead inspiring feelings of tranquil sorrow and melancholy.  Though rather ill-tended the place is unspeakably beautiful, with a scenic view of the nearby hills and river.  Most of the graves are plain stone slabs, but there are some older tombs and mausoleums belonging to residents from the late nineteenth and early twentieth centuries, including the crypt of Sebastian Corvus.  Rumours persist of tunnels and passages leading from the tombs into the caves beneath the town.

The Caves

An extensive system of caves stretches far beneath Witiko Falls.  The tunnels are labyrinthine and include some very large caverns, but instabilities, collapses, and other hazards have prevented anyone from fully mapping the caves.  Sections have been mapped, and a few “in-the-know” spelunkers have been known to go caving in them, but many return claiming that maps of the caves are unreliable and incomplete.  There are at least three commonly known entrances – one at the Falls themselves, another in the woods on a back-country road not far from the Burning Bush, and a third beneath Crow Castle, though obviously this lattermost entrance has not been used in some time, at least not by the locals.  Petroglyphs have been discovered in the caves, suggesting they were known to Native American inhabitants of the region, although some of the figures depicted in the carvings have no known cognates in Native American mythology.  In the early days of the town the caves were used by consumptives too poor to afford the spas and sanitaria of the town above, and so whole communities of the afflicted dwelt in the upper caverns for a time, hoping that the air of the caves would help to cure their disease.  Legends tell of a group of such tubercular men and women who became lost wandering the tunnels and never found their way back to the surface.  Rumour has that one can still hear the echoes of their coughing, trapped forever under the earth; some claim that their spirits haunt the caves (see Local Legends, below).

Local Legends

The Coyote Child

Persistent local legend tell of the Coyote Child, reputedly raised by coyotes in the woods around Witiko Falls.  There are contradictory accounts of this figure’s origins, but most believe him to be the son of an escaped inmate from Whispering Cedars, the psychiatric hospital in town, usually identified as Patricia Brantlinger or Theresa Beville, depending on the teller.  The story goes that the pregnant inmate wandered away into the woods and gave birth in the wilderness, dying in child-birth.  The coyotes smelled the woman’s body and the blood from the birth and came sniffing around the corpse.  They consumed the dead mother but, for reasons unknown, spared her infant child and raised him as one of their own.  This all took place in the middle of the twentieth century, somewhere in the late thirties or early forties (again, details vary).  Sightings of the boy were common through the mid-twentieth century, usually hunting with coyotes, crouched on all fours.  He has never been seen inside the town itself, and none have spoken to him.  Police searches have turned up nothing.  Occasional sightings continued, and the Coyote Child is still sometimes seen; though by now he should be an old man in his seventies or eighties, he is still described as resembling a young boy of perhaps ten or twelve.  Native Americans on the nearby Reserve believe he is a skin-walker and an evil spirit.   He has often been interpreted as an omen, his appearance foreshadowing violence to come.

The Spooks

The government employees stationed at Crow Castle are rarely seen in uniform, but common belief holds that they live undercover within the town, mingling with the locals, hiding in plain sight.  Many theories proliferate as to the identities and motivations of the Spooks, though such theories are more often discussed by conspiracy theorists than they are by locals.  Some believe the Spooks are members of some “rogue agency” or classified intelligence service within the U.S. Government, others that the Spooks aren’t federal agents at all but extraterrestrial shapeshifters masquerading as humans.  Whatever the case, the belief that the Spooks live amongst regular townsfolk in Witiko Falls is widespread and half-jokingly acknowledged by the locals, who often cheerily chastise those spouting “wild talk,” warning them that the “walls have ears” and insinuating that government agents are always listening in.  Naturally, local legend holds that the Spooks have the ability to erase or otherwise modify the memories of those who might have “made” them.

The Scold

ScoldsBridle17-18thCent

While Witiko Falls wasn’t truly settled until the early 1880s, the area did play host to a few settlers before that time, generally trappers and fur-traders, followed by gold miners in subsequent years.  One such individual was the woodsman, Andrew Fairbairn, and his wife, Judith Fairbairn, who settled in the region in 1864 in the cabin which is now known as Fairbairn Cottage or simply “the Cottage.”  Scottish of blood, Andrew was known to carry with him a number of heirlooms, which he kept in a chest of black wood in the cabin.  A trapper and hunter, Andrew strove to make ends meet as best he could, but often the pair found themselves hovering near destitution.  Judith would become agitated at such times and pressured her husband to move back east, which would enrage Andrew.  He took to employing a cruel method of punishment for his wife’s “shrewish” tongue, using one of the heirlooms taken from his ancestral chest: a scold’s bridle, used in Scotland well into the eighteenth-century as a punishment for “scolds,” or women who spoke out of turn.  He placed the macabre iron contraption over his wife’s head and would force her to wear it for hours at a time.  The muzzle was extremely painful, as spikes in the bridle would hurt the wearer’s tongue if they moved it or tried to speak.  Reputedly, during a particularly long spell of wearing the bridle, Judith decided to enact a plan of revenge.  Using hemlock she’d painstakingly grown in the Cottage’s garden she poisoned her husband’s dinner, paralyzing him but keeping him alert and awake.  She then calmly cut off his tongue and stuffed it down his throat, then sewed his lips shut, permanently silencing him; he choked on his own tongue and died.  Rumour has that the murder would have gone undiscovered had a lost traveller not come across Judith chopping up the body for burial with her husband’s own axe.  The traveller carried a revolver, to be used against wild beasts or others who might menace him; Judith, discovered, came at him with the axe but was shot and killed.  According to the traveller her mind had snapped and she was still wearing the scold’s bridle at the time of her death.  To this day, sightings of Judith’s ghost have been reported by those walking the woods near Fairbairn Cottage.  Her apparition, known as the Scold, has since become a local bogeywoman, said to prey exclusively on men who abuse their wives or girlfriends; such individuals are said to turn up dead, sometimes in the woods but often in their own beds, with their tongues cut out and their lips stitched shut, killed in the same manner as Andrew Fairbairn.

The Coughers

Also called the Coughing Ghosts, the Coughers are supposedly the descendants or spirits of tuberculosis sufferers who lived in the caves beneath Witiko Falls and became lost or cut off from those in the main grotto.  Supposedly, spelunkers have heard the Coughers wandering about the dark caverns, and occasionally found signs of their presence, such as clothing, gnawed bones, tools, or carven marks.  What, exactly, the Coughers are supposed to have eaten over the long decades between their disappearance and the present day has never been adequately explained, although cryptozoological enthusiasts point out that several entrances to the caves have been found, suggesting that the Coughers emerge from the depths to hunt wild animals – although why, then, they didn’t rejoin civilization remains equally unclear.  Paranormal theorists prefer to posit that the Coughers became ghosts haunting the caves, preying on those who explore too deeply into the tunnels.  Whether troglodytic degenerates or disembodied phantoms, the Coughers are said to be heralded by the sound of their rasping, consumptive hacking and spluttering.

The Grey Devil

The creature known as the Grey Devil is a gigantic North American opossum, possibly a mutant, that lurks in the woods around Witiko Falls, at least according to cryptozoologists and some conspiracy theorists.  Though native to the eastern half of the continent, opossums are not unknown along the Pacific west coast and can be found as far north as British Columbia, but are rarely seen in Montana or Idaho, leading theorists to suggest that the Grey Devil is an escaped pet, a prehistoric creature that has survived the long centuries against all odds, or perhaps a government experiment gone wrong.  The Native American inhabitants of the nearby reserve believe it to be a trickster spirit.  Whatever its origins, the Grey Devil – and, occasionally, its supposed young – has been glimpsed by a number of hikers and wilderness enthusiasts, often hanging from the upper boughs of a particularly thick-branched tree.  Reports vary as to the beast’s size: some claim it’s about the size of a large dog, while others insist it’s bear-sized.  Most accounts suggest the creature is interested primarily in scavenging; it has been sighted digging through trash and also attempting to exhume recently buried bodies at the Mountain Shadow Cemetery, though some also claim that the Grey Devil ate their pets.  Some theorists speculate that the smell of the giant opossum is the reason for erratic animal activity within Witiko Falls.  Its lair is popularly believed to be found somewhere within the caves below the town.

St. Severine’s Skull – Character Portraits

These character portraits were drawn by the talented Bronwyn McIvor (of Beemonster Illustration), who plays Wynflaeth.  This is the party I’ve been taking through the St. Severine’s Skull Megadungeon.  They’re currently on the second level of the Dungeons below the Keep in the Inner Bailey, way ahead of the material I’ve posted here (they’ve been through the Gatehouse, Chapel, Catacombs, Library, Archives, Black Tower, Laboratories, Cellars, and the 1st level of the Dungeons so far).  They’re a pretty balanced party and have been playing well, with no deaths – they mostly consist of new players who don’t have bad habits and so actually run away when things seem dire or too hot to handle.  They’re getting close to the Skull but they’re running very low on food and spells at the moment; at the end of the last session they locked themselves in a forgotten treasure vault in hopes of deterring the Goblin tribe inhabiting the Keep from feasting on their flesh.

Wynflaeth

Wynflaeth (Half-Elf Cleric) and Biff the War-Pony.

Simsa

Simsa, Gnome Ranger – a possibly deranged xenophobe and nature-lover.

Tully

Tully, a definitely deranged fire-worshipping Dwarf Barbarian with a zeal for the destruction of Undead, preferably by cleansing flame.

AndroAndro, an Aasimar Rogue in the service of the Church.


Realms of the Haunting – Retrospective

Realms of the Haunting

I’ve been reading and rereading a lot of William Hope Hodgson recently as part of my academic research, and after finishing his Weird short novel The House on the Borderland (1908) I decided to begin replaying a game that features another strange inter-dimensional house, Gremlin’s Realms of the Haunting, a wonderful old diamond-in-the-rough that, for me, possesses immense nostalgic value.  Along with Heretic, Lands of Lore, Myst, and Diablo it holds a special place in my heart as one of the first computer games I played that didn’t involve shooting ducks or dying from dysentery somewhere in the American Midwest.  I picked up the game a couple of years ago from gog.com on a whim, expecting to find it nothing more than a quaint trip down memory lane, but after playing it through once again I was pleasantly surprised to discover that the game’s incredibly rich story, complex mythology, eerie atmosphere, and engaging gameplay combine to create an experience that holds up shockingly well nearly two decades after its initial release in late 1996.  The graphics, granted, show their age in a way that other adventure games from the same era (for example, the unfathomably gorgeous Riven or the stylish masterpiece Grim Fandango) avert; the pixelated 3D graphics, the lack of properly three-dimensional objects in the game, and the clunkiness of the Normality engine make for a game that now looks somewhat primitive and artificial, with a maximum resolution of 600×480.  The cutscenes are entirely live-action, the actors largely acting against a green screen and delivering campy but surprisingly competent performances, and while generally I’m not a huge fan of the strange effect seeing live actors transplanted into a computer-generated setting produces (increasingly, in fact, I dislike cutscenes in general), here the FMV works rather well: actors David Tuomi and Emma Powell portray the protagonists – moody, trench-coat wearing Adam Randall and alluring psychic Rebecca Trevisard – quite ably, and their physical performances give both characters much more personality than the sprites or 3D models of the day would have.  In an age of photo-realistic computer-generated cutscenes there’s something charming and quirky about the live-action performances, which are supplemented by a vast amount of voice work; every painting, suit of armour, door, weird sigil, candlestick, coat stand, and cartridge in the game can be examined, with Adam (and sometimes Rebecca) orally commenting on the object in question.  The clips aren’t so frequent that they become annoying, but they’re common enough that spread throughout the game there’s over 90 minutes of FMV.

ROTH Hell

As a whole, in fact, Realms of the Haunting almost benefits from its technological limitations.  Modern horror games and first person shooters tend to be relatively brief affairs, in part as a consequence of their graphical extravagance; even Half-Life 2, which I think of as quite a long game by today’s standards, clocks in at around fifteen hours on average and can certainly be completed in much less.  In contrast, Realms of the Haunting lasts for well over forty hours, and little of it feels repetitive in the way that some long games can.  The graphics may be crude but the levels are well designed, sprawling and intricate, filled with secret doors, sub-levels, portals, puzzles, mazes, Escheresque chambers, teleport pads, hidden nooks, and other curiosities.  Atmospheric details abound – like a typewriter spewing creepy, repetitious text of its own accord, or the Satanic carvings in the depths of the Mausoleum – and the game manages to cultivate a fairly unnerving atmosphere at times.  It never approaches the masterful terror elicited by the likes of Amnesia nor the frenetic, adrenaline-fuelled tension of something like Outlast or Bioshock, but it did occasionally startle me, and what it does manage very well is a dense aura of eldritch gloom and mystic strangeness.  It’s tempting to throw around the adjective “Lovecraftian” here, but as the game’s writer and producer Paul Green notes, the game’s mythos is based primarily on real-world religions and occult systems, a syncretic Judeo-Christian mishmash with bits stolen from various Eastern religions, Kabbalah, Gnosticism, Spiritualism, Zoroastrianism, and Christian apocrypha.  Green also cites John Carpenter and that amusingly lurid bit of messianic crackpottery The Holy Blood and the Holy Grail as influences, the latter of which is especially visible in the game’s depiction of a heretical secret society of corrupted Templars whose leader, the effetely nefarious Elias Camber (an anagram of “Bears Malice” and “Macabre Lies”), alias Claude Florentine, serves as one of the main antagonists.

The game’s slowly unfolding story (warning: mild spoilers to come) begins with what seems like a fairly hackneyed setup.  Following his father’s death, Adam is tormented by dreams of a peculiar house in Cornwall which he eventually seeks out and enters; the decrepit old mansion, with its animate portraits, rusting suits of armour, mildew, and similarly Gothic accoutrements at first appears to be a staple haunted house of the most typical sort, but the scenario quickly become more complicated with the manifestation of Adam’s father’s ghost, a rather Shakespearean spirit that beseeches his son to free him from the agonies of Hell before being dragged back to the pit by a number of menacing armoured shades.  Things only get odder as the game evolves and a complex tissue of associations between various angels, Goetic demons, elemental spirits, and mystic brotherhoods coalesces.  Complicating the Manichean dichotomy of Light and Dark that dominates the central conflict are such enigmatic entities as the bizarre and grumpy gatekeeper-creature and Keeper of Time known as the Gnarl; the gibbering, phantasmal horror of the Ire with its hypnotic song and its bestial avatar, the Dodger (which, I suspect, may owe its inspiration to Machin Shin, the “black wind” that haunts the Ways in Robert Jordan’s Wheel of Time, though I can’t be sure); a water deity, Tishtrya, ripped straight from Zoroastrian mythology; and the benevolent ghost of Aelf, a medieval knight and reincarnation of St. Michael – to name a few.  Visions, weird magickal artefacts, relics, unholy brands, riddles, crypticisms, mouldering journals, and other miscellanea are scattered throughout, some of them providing clues as to the overall shape of events, others producing more questions than answers.

ROTH9

In fact, it takes quite some time (probably about 10 chapters or so) for a coherent picture of what the hell is going on to come into focus, and for much of the game you’re left physically and figuratively in the dark to a large extent, wandering the labyrinthine vastness of the old house and the tunnels beneath it, stumbling upon esoteric oddities and perils.  This works immensely to the game’s advantage.  Horror is a genre that really requires slow pacing; the best horror movies and stories know this, revealing their monstrosities only gradually, in an abominable striptease (as in, say, Alien).  There’s an entire school of thought – exemplified in The Philosophy of Horror by aesthetician Noël Carroll – that claims that when we consume horror media we’re not actually craving fear or disgust, the chief affects the genre produces, in and of themselves; rather, we’re seeking compensatory pleasures for which these emotions are mere concomitants.  The process of solving a mystery, of ratiocination and deduction and the play of proofs, imparts the actual pleasure, Carroll claims; everything else is a by-product.  I don’t find Carroll’s theory especially convincing, but it can’t be entirely dismissed, either; I do think there’s something to be said for the appeal of the unknown and the curiosity it incites.   Another, much older theory offered by weird fiction author and fin-de-siécle mystic Arthur Machen in his aesthetic treatise Hieroglyphics (1902) suggests that the best literature conjures a sense of “ecstasy,” by which Machen means the numinous, wondrous, and mysterious, and I think horror is uniquely capable in this regard, with its penchant for interstitial monstrosities and unknowable malevolences.  Certainly Realms of the Haunting knows the value of a good mystery and in not revealing too much too quickly.  In a certain sense, the game invites the player to become a bit of a mystic themselves, as you’re constantly compelled to seek a series of revelations, to uncover what has been hidden and, slowly, to piece together a picture of events from a confusion of disparate parts as your character participates in transformative rituals both sacred and profane.

ROTH Throne

Though the cosmic vistas Adam and Rebecca explore are intriguing, the house itself and its associated dungeons comprise the most compelling setting.  Like the sinister Spencer Mansion of Resident Evil (released in the same year as Realms of the Haunting) or the ooze-infested ruin of Amnesia’s Brennenburg, the house is a sort of character in and of itself, sometimes seeming to possess a capricious will of its own.  I have no idea if the eponymous house in Hodgson’s The House on the Borderland was actually an influence on the designers or not, but there are certainly some major similarities.  Of course, the trope of the haunted house is a well-worn one, but what’s interesting about the house in Realms, as in Borderland and in the more recent postmodern take on the haunted house, House of Leaves, is the way the house functions not only as an example of the Freudian uncanny with its Gothic subversion of domesticity (not to mention its cavernous, quasi-uterine spaces) but as a locus of what China Miѐville would call the abcanny.  If the uncanny or unheimlich is about the return of the repressed in a familiar-yet-not-familiar form – the manifestation of what Freud terms “womb-phantasies,” old wine in new bottles, and what Derrida calls the hauntological – then the abcanny is about a more radical unfamiliarity, an otherness and alterity utterly beyond our ken, always evading comprehension, resisting attempts to impose meaning or structuration.  This sense of the cosmic, the weird, the awesome and the awful, the unknown (perhaps the ecstatic, in Machen’s terms) suffuses the house in Realms of the Haunting, with its faceless guardians and its interminably winding, unpredictable corridors, its doors which sometimes lead into dank cellars but which also open on primordial caverns and alien cosmoses and gigantic demon-summoning clocks.  It’s this ambient numinousness erupting violently out of the quotidian architecture of Realms‘ house that makes it so special and surreal.

The gameplay itself is intriguing, as the whole thing is very much a hybrid of an adventure game, a Doom-style FPS, and a survival horror game; there are times when you’ll go for quite some time encountering only a few enemies, and others where you can’t go more than a room or two before activating some conjurer’s circle and summoning another fiend or three that require mowing down.  At the beginning you have to husband your resources carefully, as the game provides little ammunition for the pistol and shotgun you quickly acquire, and the only other weapon you initially possess, a sword, is difficult to use without being carved to ribbons yourself by the mostly melee-focused foes.  It doesn’t take too long, however, for rechargeable magic weapons to make an appearance, at which point I stopped using guns almost entirely and stopped worrying about searching every corner of every room for ammo.  The controls are clumsy in a way that the game kind of pulls off (again, the technological limitations here actually help as much as hurt), as when you’re fumbling with the controls for your sword, shield, or pistol while some hooded Thing bears down on you there’s a nice little spasm of panic that a smoother, more intuitive combat system would have effaced.  Large swathes of the game, however, are spent puzzle-solving, as in one strange sequence set in the Room of Riddles in one of the game’s four planes of existence (Realms), which seem loosely based on the four Kabbalistic layers of reality.  The game as a whole is fairly linear, but individual levels are quite open, and once you’ve dispelled some of the mystic seals that keep certain doors in the central house shut you can explore the entire non-linear sprawl of the mansion, with the game often requiring you to retrace your steps and return to particular rooms or other areas.  Dungeon-crawling fans will find much to enjoy in Realms’ maze-like passages, which are variegated enough not to get monotonous.

House Map

Realms of the Haunting absolutely cries out for a remake (though tragically I’m sure remaking an obscure 90s horror game with mediocre sales isn’t likely, even given Realms’ critical acclaim).  Frictional Games’ HPL engine would be perfect, I think, though I’m sure there are other choices that would also work well.  Even with the dated graphics and gameplay, however, the game still has a great deal of character.  I’m thinking of picking up Clive Barker’s Undying, which somehow I still haven’t played, in hopes of finding something that scratches the same itch (apparently, Undying suffered from exactly the same problem as Realms: strong critical acclaim, terrible sales).  What I’d really like to see is a modern game that combines the panic, dread, and visceral affective potency of recent survival horror offerings with the baroque storytelling style and weird atmosphere of Realms of the Haunting; if anyone knows of something that fits that bill, let me know!

St. Severine’s Skull: Hexenburg Castle – Catacombs

A-Procession-in-the-Catacomb-of-Callistus

Soundtrack

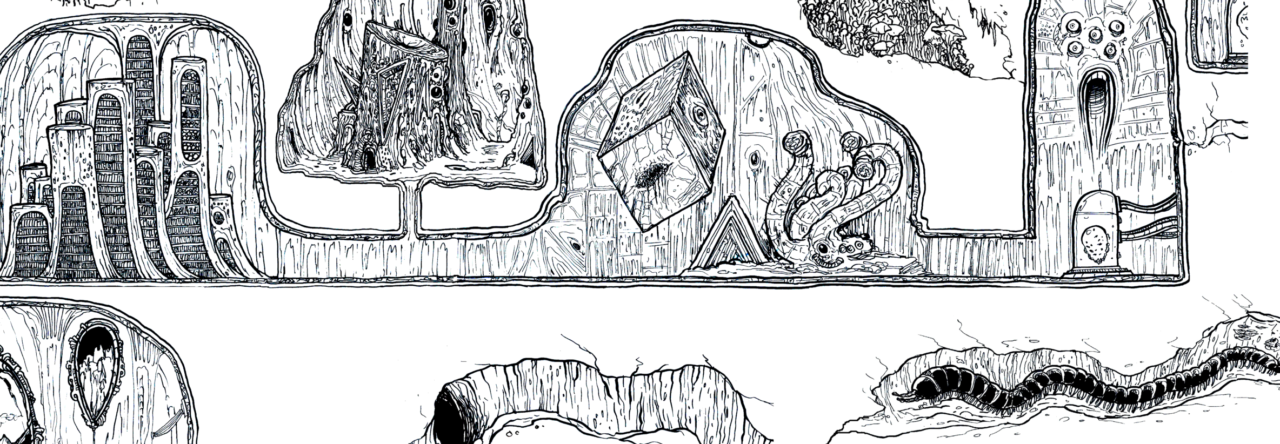
As you descend the stair to the catacombs, you feel a wave of unease ripple through you.  The tunnels here are of hewn stone and ancient brick, carved with unfamiliar characters – probably a remnant of the original Imperial fortress.  A thick layer of dust covers everything, disturbed only by the Father’s footprints.

Perception DC 10:

Somewhere in the catacombs you can hear what sounds like a dull heartbeat, echoing through the winding passages.

The catacombs contain dozens and dozens of skeletons, but while Saint Severine’s heart beats within its sepulchre, they cannot rise.  The moment the heart is destroyed or removed, the skeletons will animate en masse.  However, even if the heart is not destroyed, there are several monsters here – dire rats, a cluster of gricks, vermin, an ooze, and similar creatures.

If the heart is destroyed or removed from the catacombs, very bad things happen.  There are opportunities along the way to mitigate these things, like lighting candelabra and chandeliers in the ossuaries, or covering the floors with embalming fluid and anointing oil to form make-shift fire traps.  Still, destroying the heart could result in the whole party being overwhelmed if they are not careful.

Random Encounters

The catacombs are a dangerous area, somewhat beyond the abilities of a 1st or 2nd level party; low-level characters may not be able to effectively “clear out” the space fully.  To help reflect this, random encounters in the crypts can be a bit more frequent than in other parts of the dungeons.  Note that apart from the Huecava there actually aren’t any undead here unless the Heart of St. Severine has been removed or destroyed.

Roll d10 Result
1 Slime Mould.
2 1d6 Dire Rats.
3 1d4 Slime Crawler Larvae.
4 Giant Centipede.
5 1d4 Stirges.
6  Giant Stirge.
7  1d2 Gricks.
8  1d3 Slime crawlers.
9 Spider Swarm from the Archives.
10 Otyugh.

Level 1

Catacombs Level 1

C1 – Embalming Chamber

A pair of stone slabs are evident here, mottled with old stains.  An array of tools – knives, scalpels, saws, and other implements – are arranged neatly on a stone shelf to one side.  The air here smells lingeringly of spices, preservatives, and decomposition.  Curiously, there are some strange skins on the floor, squamous and translucent, like the moulting of some large reptile.

C2 – Embalming Supplies

The door to this room is locked (DC 20 to pick, DC 20 to force) and can be opened with the silver key.

Dozens of jars of embalming fluid are stored on wooden shelves here, along with a great quantity of bandages, herbs, dyes, and other preservatives.  Funerary shrouds and other cerements, sewing needles, thread, cups, and anointing oils are also stored here for the consecration of the dead.

Though the players may not realize it, the contents of this room are incredibly valuable.  Each jar of embalming fluid is worth 50 gp, though it weighs 10 lbs, so if they somehow managed to transport all 50 jars of it out of here they’ll be 2500 gp richer.  There are also 20 jars of anointing oil here (25 gp each).  Both oil and fluid are also extremely flammable, making them very useful in a fight against the undead.  They don’t burn quite as well as alchemist’s fire, but if lit they deal 1d4 fire damage per round to anyone standing in them.

C3 – Defaced Shrine

A small shrine, presumably for the blessing of the dead before their internment, is evident here, but like the chapel upstairs it has been defiled.  The statue of an unidentifiable saint that presided over the shrine has been decapitated and otherwise defaced, its marble body smeared with old bloodstains, eerie runes daubed on the walls.  Black candles are scattered about the altar, upon which is stretched a small, burnt skeleton, likely that of a Halfling, Gnome, or human child.  The murals on the walls have been subtly defaced – the beatific figures, angels, and prophets they depict are all weeping blood or bear expressions of maniacal rage or lust.  Nailed to one wall are the remains of a large bird.

The Aklo runes here read “Praise be to the Carrion Queen” (Linguistics DC 20 to decipher).  Anyone who reads them out loud accidentally invokes a Bane spell, Will DC 15 to resist.

C4 – Ossuary

A huge number of bones has been stored in the walls of this cavernous ossuary, sorted by type: skulls, femurs, finger bones, ribs, spines, and every other sort of bone.  A chandelier made from human bones is suspended from the ceiling of the round chamber.  This place is truly vast – there must be hundreds of dead buried here.

If the heart is destroyed, treat the mass of bones reanimated here as 2d20 unarmed Skeletons.

Anyone taking the effort to light the chandelier will prevent the dead from rising even if the heart is destroyed.  If they are later blown out, the bones will reanimate.

C5 – Ossuary of Skulls

This round ossuary consists on shelf after shelf of skulls – hundreds, perhaps thousands of them.  None of them are marked in any fashion.  A central pillar made from human skulls and other bones holds up the vaulted ceiling, and bony candelabra are scattered about the room.

If the heart is destroyed, a Skull Swarm appears here.

Anyone taking the effort to light the candelabra will prevent the dead from rising even if the heart is destroyed.  If they are later blown out, the bones will reanimate.

skull shelves

C6 – Damaged Ossuary

This circular ossuary has been thoroughly despoiled, its cadaverous candelabra smashed, its shelves of skulls toppled, its racks of bones scattered and broken.  A hideous, vaguely serpentine thing is bent over one skeletal heap; it uses the four tentacles that snake from its stub-like head to pick up bones and crack them in two, devouring the marrow with its beaked, squid-like maw.

A Grick lurks here.  If even remotely wounded the Grick quickly retreats into the grick lair in Ossuary 6 (C9).

If the heart is destroyed, treat the mass of bones reanimated here as 2d20 unarmed Skeletons at half hp.

Since the candelabra here have been smashed, they cannot be lit to prevent the dead from rising.

C7 – Children’s Ossuary

This large, round ossuary looks to contain the remains of children – the bones here range in size, but all of them are very small.  Many have been affixed to the walls and ceiling to form sacred designs.  A small shrine with unlit candles and bowl for proffered coins sits in the center of the room.

Lighting the candles and leaving at least 1sp in the bowl prevents 2d20 Small Skeletons from spawning here if the heart is destroyed.

C8 – Tableau

This rectangular ossuary is extremely elaborate, with multiple corpses dressed in the now-tattered robes of monks, presiding over a macabre shrine made entirely of bones, complete with a bone altar and bone icons affixed to the walls and ceiling, and a bone rack with dozens of candles.

As usual, if the candles are lit here, then it prevents 2d20 unarmed Skeletons at half hp from rising if the heart is destroyed.

C9 – Grick Nest

A heady animal musk fills the air of this desecrated ossuary, which is covered in moulted reptilian skins.  The shelves of neatly sorted bones that would once have lined the walls have been thoroughly plundered, formed enormous charnel heaps of gnawed human remains.  A great heap of enormous, sallow eggs is secured to one wall with a sticky mucilaginous slime.

Two gricks are hiding in the bone-piles – Stealth +14.  They attack anyone who interferes with the eggs or lingers in this chamber.

Dem Bones
C10 – Tomb of St. Helga’s Font

The stone door to this tomb is locked (DC 25 or silver key to open, DC 25 to force).

This small, square tomb is lined with carved niches, each containing a human skeleton wrapped in rotting cerements.  Large black rats scurry to and fro, squeaking and chittering.  Along one wall of the tomb is a small alcove with a statue of Saint Helga the Fair, a protector of the dead and patron saint of the murdered and mutilated.  In her hands she holds a small basin that looks like it might once have held water.  Unlike the other statues you’ve seen in the catacombs, this one has not been defaced.

Placing holy water in the basin sanctifies the corridor, preventing 12 skeletons from rising if the heart is destroyed.  A Cleric who prays at the shrine receives a Blessing of Fervour (this is useable once per day)

The dead here do have a few odds and ends – a thorough looting turns up 4 copper rings (2 gp each), 3 silver rings (5 gp each), and a Charm Bracelet with only a Loving Heart charm remaining.  Looting the dead, however, ensures they will rise.

C11 – Tomb of the Blasphemous Book

The stone door to this tomb is locked (DC 25 or silver key to open, DC 25 to force).

This square tomb has carved niches along the walls containing dozens of skulls, which all bear decorative paintings of religious scenes, though age and the depredations of rats and other vermin has caused some of their paint to peel.  At the far end of the tomb stands a lectern upon which a book sits open.  Two unlit braziers flank it.

If the heart is destroyed, a Skull Swarm appears here, unless both braziers are lit.

The book is quite strange:

On the surface this book appears to be a very standard holy text, a collection of scriptures with ornate illuminated illustrations.  However, closer inspection reveals that the text seems to have been changed.  The illustrations are subtly wrong – figures who should be heroes and saints are depicted with strange deformities, and many scenes are hideously transformed so that the holy men and women depicted are engaged in acts of extreme depravity or violence.  Moreover, key words in the text have been altered or unusual endings tacked on to parables so that the wrong lesson is taught, the forces of Light and virtue ridiculed, and those of sin and excess lauded.

If studied for 48 hours or more over at least 6 days, the Blasphemous Book plagues any Good character who reads it with nightmares that prevent them from sleeping properly, waking up fatigued, for 1 week.  Evil characters, however, find the book’s subject-matter invigorating and receive a permanent +1 inherent bonus to an Ability score of their choice.  This text is worth 10,000 gp, but almost no one save heretical cults and the like would buy it – selling it could be an adventure in itself.  If the players wish to appease the Cult of the Withered Hand, who will be arriving at Hexenburg shortly, the book may be helpful.

C12 – Warrior’s Tomb

This long hall has many carved niches holding skeletons garbed in mail and clutching rusted swords.  A crumbling stair leads down into darkness.

Perception DC 15 to spot the Grey Ooze on the floor – it looks like a glistening patch of stone.

There are 12 skeletons with rusted longswords garbed in splint mail (AC 21) who rise if the heart is destroyed.

C13 – Dire Rat Nest

The stone door of this tomb has been smashed open and the chamber has been invaded by rats; the carved niches along the walls have been emptied of their skeletons and now form a series of nests.  Several abnormally large black rats scurry around, gnawing bones.  Rat-holes riddle the walls wherever the stonework has decayed.

Investigating the rat-nests yields 44 gp, 56 sp, and 134 cp.  There is also a small Idol of Crom Mogg here, a verdigris-encrusted statuette resembling a deformed humanoid with a dozen rat tails and four rat-like heads.  The disgusting idol allows any who prays to it and sacrifices before it to reroll all failed saves vs. disease or poison for one day, though they must accept the second result.  However, use of the idol warps the supplicant subtly, and they begin to give off a foul odour (-4 Charisma).  Ceasing use of the Idol allows the smell to disperse after three days.

There are 12 dire rats in this room; 3 will attack each character if anyone lingers here or starts searching the nests, and more will begin assailing the adventurers if they continue to loot the nests.

C14 – The Wyrmwife’s Tomb

The stone door to this tomb is locked (DC 25 or silver key to open, DC 25 to force).

A sarcophagus with the effigy of a grim but beautiful woman stands at the center of this chamber.  The walls are adorned with somewhat sinister paintings of a beautiful woman – possibly the same one interred here – falling in love with a mysterious figure who eventually reveals himself as a monstrous white wyrm in disguise.  The dragon is eventually slain by a knightly figure, and the woman is shown throwing herself from a cliff to join her paramour in death.

This is the tomb of Lady Lys, called the Wyrmwife, whose story can be known with a DC 20 Knowledge (nobility) check.  Lady Lys became betrothed to an enigmatic nobleman, Sir Pyotr, who was eventually revealed, as the murals depict, as a dragon.  He sired a child on Lady Lys, the bastard known as the Wyrmchild, who went on to perform deeds of great valour.  However, he was slain by Lady Lys’ jealous cousin, Sir Rudolf, and Lady Lys subsequently killed herself out of grief.

Getting a sarcophagus open requires a DC 20 Strength check or a crowbar.  Within lie Lady Lys’ remains garbed in a beautiful and well-preserved gown (120 gp) and adorned with a golden wedding ring (25 gp).  Pressed to her breast is a token of her dead dragon-lover, a single fang, hung on a golden chain around her neck and clasped to her bosom in her cold hands.  If worn, the Fang of the White Wyrm allows its bearer to speak Draconic and gain Cold Resistance 5.  It is worth 8000 gp.

If the heart is destroyed, Lady Lys rises as a Wight.

C15 – The Sepulchre of the Cudgel of Redemption

The stone door to this tomb is locked (DC 25 or silver key to open, DC 25 to force).  Upon it is a graven image of Sir Arngrim, a bearded, armoured knight with bare head, wielding the Hammer of Redemption.  The door is also trapped with a Glyph of Warding (DC 28 to find or disable – dispel is more likely) with a Terrible Remorse spell keyed to it (Will DC 17).

This large burial vault has but a single sarcophagus bearing the effigy of a stern, bearded warrior carrying a huge club carved with passages of scripture.  The walls here are adorned with dusty murals depicting the same warrior fighting hordes of tattooed, savage-looking warriors in a variety of settings.

Opening the sarcophagus requires a DC 20 Strength check or a crowbar.  Within, the skeleton of a knight dedicated to Sir Arngrim can be found, armoured in masterwork splint mail and bearing the Cudgel of Redemption, a +1 Holy Greatclub.  Against Evil Clerics and Blackguards, the weapon is even more effective, essentially acquiring the Bane ability (+2d6 additional damage) against such foes.  The Cudgel is worth 20000 gp.

If the heart is destroyed, the skeleton rises from the dead (as an undead creature, he doesn’t suffer from negative levels, so he can still wield the Cudgel) as a Wight, though armoured in masterwork splint mail (AC 21).

Level 2

Catacombs

Cataombs Level 2

C16 – Looted Servants’ Crypt

The door to this series of crypts has been broken down.  A dozen wooden coffins are placed in this long, vaulted chamber, though they are badly rotten and infested with vermin.  Flies buzz about the room and rats scurry everywhere; some of them seem to have made their nests in the decaying coffins or in the walls.

There’s really not much to loot here – the servants weren’t buried with any jewellery.  If the heart is destroyed, 12 Zombies at half hp rise from the dead.

C17 – Infested Servants’ Crypt

A disgusting, vaguely slug-like creature with a clutch of slimy tentacles and a pair of insectoid mandibles gorges itself on the flesh of an embalmed corpse in this room, which contains a dozen plain wooden coffins.  Some of the others have likewise been broken into, but most of the coffins here are relatively intact, though starting to decompose.  The large slug-thing seems very busy eating, rapidly devouring the corpse.

A Slime Crawler lurks here.  Nothing of value here, but 8 Zombies rise from the dead here if the heart is destroyed.

C18 – Undefiled Servants’ Crypt

The stone door to this tomb is locked (DC 25 or silver key to open, DC 25 to force).

A dozen finely wrought wooden coffins are placed in niches in this chamber or laid on low pedestals throughout the room.  They don’t look like they’ve been disturbed.  At the far end of the chamber is a small, rather plain font, long gone stagnant.

Nothing to loot here, though 12 Zombies rise if the heart is destroyed.  If someone casts Purify Food and Water on the font, the dead don’t rise in this room.

Casket

C19 – Scholar’s Crypt

The stone door to this tomb is locked (DC 25 or silver key to open, DC 25 to force).

This small crypt bears a number of stone sarcophagi carved with images of robed men – perhaps priests or scholars.  Their expressions are beatific and wise; one has an impressive beard.  The walls are adorned with finely carved passages of holy scripture.

The 6 scholars buried here rise as Zombies if the heart is destroyed.  The tales on the walls recount various parables of the seven virtues (chastity, temperance, charity, diligence, patience, kindness, humility).

Getting a sarcophagus open requires a DC 20 Strength check or a crowbar.  Within, the scholars have a few objects of value, but the bearded scholar has a masterwork quarterstaff.

C20 – The “Dining” Room

This chamber has been set up in a macabre tableau.  A dozen skeletons dressed in decaying finery have been arrayed around a massive table made of bones and preserved human skin, all of them seated in bone chairs.  Hanging on the walls are tapestries bearing a wolf’s head symbol, sometimes quartered with other heraldic sigils – trees, moons, stars, a bear’s paw.  The table has been set with fine silverware, and the skeleton of a monstrous boar sits in the middle of table, surrounded by the skeletons of fowl, rabbits, and other beasts.  The scene comes complete with a skeletal jester with a bell-cap and motley, poised near the head of the table where a lordly skeleton raises a cup set with black jewels in a toast.

The 12 Dinner Guests rise as skeletons if the heart is destroyed, attacking with silver cutlery (treat as daggers).  The cursed jewelled cup is called the Cup of Desiccation.  Anyone who drinks from the cup becomes horribly desiccated, taking 5d6 points of non-lethal damage and becoming fatigued unless they pass a DC 20 Fortitude save.  In addition, the character cannot slake their thirst for 1d3 days after drinking from the cup, even if they pass their save.

C21 – Knight’s Crypt

The stone door to this tomb is locked (DC 25 or silver key to open, DC 25 to force).

Three stone sarcophagi bearing the effigies of armoured knights clasping swords to their chests stand at the center of this chamber.  Adorning the walls are dozens of shields, helms, swords, and spears, somewhat rusted but otherwise intact; some of them look exceptionally well made.

There are 3 masterwork longspears and 6 regular longspears, 3 masterwork longswords and 10 regular longswords, 2 masterwork bastard swords and 3 regular bastard swords, and 6 masterwork heavy steel shields and 12 regular heavy steel shields here.  The dead in the sarcophagi rise as Skeleton Champions.

skulls

C22 – Chamber of the Gargoyle Lamp

A large, ornate lamp is set in an alcove halfway along the wall of this dusty hall.  The lamp is forged to resemble a grimacing gargoyle, its mouth vomiting light.

The lamp is a Gargoyle Lamp.  When lit and used to illuminate a statue that statue becomes temporarily lively enough to answer simple questions posed to it about what it may have seen over the years (provided the statue has a mouth).  Statues enlivened in this way can lie if they wish – they are not compelled to answer truthfully.  Each use of the Lamp rapidly burns a pint of lamp oil.  The Lamp is worth 7000 gp.

The niche containing the Gargoyle Lamp is trapped with a pressure plate (Perception DC 20 to notice, Disable Device DC 20 to disable).  Anyone who removes it without disabling the trap first activates a poisoned arrow trap concealed in the wall opposite the Lamp.

C23 – Defiled Noble’s Crypt

This richly appointed crypt has been defiled, one of its six marble sarcophagus broken open, the sculpted effigy on its lid shattered.  Feasting on the embalmed remains within the broken sarcophagus is a black rat the size of a small dog, tearing through the corpse’s cerements with razor-like incisors.  Whoever broke into the sarcophagus probably already looted the body.

The remains rise as a Zombie with half hp; the remaining 5 rise as Zombies with full health.

There’s also a dire rat here.

C24 – Wulfheim Noble’s Crypt

The stone door to this tomb is locked (DC 25 or silver key to open, DC 25 to force).

Half a dozen marble sarcophagi fill this chamber, each bearing the sculpted, marble likeness of a man or woman in rich attire.  Hung on the walls are faded hangings depicting a heraldic symbol of a black wolf’s head with red eyes and gleaming white teeth.

The noblemen here rise as 6 Zombies if the heart is destroyed.  Each is garbed in a noble outfit (75 gp) and bears a signet ring of the House of Wulfheim (5 gp each).  One of the women also has a bloodstone necklace (100 gp).  Getting a sarcophagus open requires a DC 20 Strength check or a crowbar.

C25 – Slimy Noble’s Crypt

This crypt contains six marble sarcophagi, but the marble effigies on their lids have been badly disfigured, pockmarked and eaten away.  Covering the ceiling and three of the walls of this expansive crypt is a glistening green slime.  Across the only wall not covered in slime is a huge, peeling mural depicting a battle between a group of armoured knights whose shields all bear a wolf’s head symbol and a ragged band of barbaric-looking warriors clad in furs.  The two forces meet in a snow-swept valley, the rocks spattered with blood from their vicious combat.

Green slime coats the walls.

The sarcophagi are Strength DC 20 (or crowbar) to open.  Inside are six embalmed dead (they rise as Zombies if the heart is destroyed) wearing noble outfits and signet rings.  One is also buried with a silver circlet worth 50 gp.

C26 – Collapsed Noble’s Crypt

The stone door to this tomb is locked (DC 25 or silver key to open, DC 25 to force).

Part of this hall has collapsed, burying some of the stone sarcophagi here and smashing others open to expose the embalmed, richly attired dead within.

There are 3 intact bodies, which will rise as Zombies if the heart is destroyed (they wear noble outfits and have signet rings).  Knowledge (engineering) or Stonecunning Perception DC 10 to tell that the room is definitely prone to further collapse.

C27 – Crypt of the False Sarcophagus

Tomb raiders or other looters have defiled the three ornate sarcophagi in this chamber and stripped it of valuables.  Scattered bones – what’s left of the occupants – and a few rusted shields and swords are all that remains here.

There aren’t any valuables here, but there is an undiscovered secret door – Perception DC 20 to discover it.  It’s actually a sarcophagus – one of the eyes of the cherubim on the sarcophagus opens the false bottom.  The tunnel beneath leads into the Laboratories (beneath the Black Tower).

C28 – The Door of Teeth

A pair of baroquely forged iron doors looms out of the darkness here, bearing the uncanny resemblance of a snarling wolf with bared fangs.

These doors are locked (DC 30 or use the silver key).  Any who enters who is not of the blood of Wulfheim must pass a DC 20 Will save or be stricken by the Curse of Teeth.  This horrific curse causes the teeth of the accursed to grow into twisted, disfiguring fangs that impair their speech (imposing a -6 penalty on any skill checks involving speech) and deal 1 point of Con damage as they grow in.  Each day, the curse continues to wreak havoc, teeth sprouting first from the character’s neck and face, then their back and shoulders, then spreading across their body, dealing 1d3 Dex and Con damage per day until the accursed dies or the curse is removed.  Accursed characters do gain a Bite attack (1d3 damage) as a natural attack.

C29 – The Sepulchre of the Wolf’s Fang

Within this ornate burial vault is a baroque sarcophagus set with an effigy of a cruel-featured nobleman.  Murals on the walls depict images of slavering black wolves with red eyes, staring at you hungrily, their fangs slavering.

The sarcophagus has a Greater Glyph of Warding on it (DC 31 to find or disable) keyed to a summoning spell causing a Hell Hound to manifest:

As you open the sarcophagus’ lid, a bloodcurdling howl echoes through the room, and a huge creature pads from the shadows at the rear of the chamber, as if spawned from the darkness itself – a massive black wolf, flame curling from its maw

Within the Sepulchre is the ancient Count Damien von Wulfheim.  He is garbed in the equivalent of a royal outfit (200gp), bears a signet ring (5 gp), and clasps the Wolf’s Fang, a +1 Wounding Bastard Sword with a pommel shaped like a wolf’s head with rubies for eyes.  He also wears the Frost Crown, a powerful magic item which possesses the following abilities:

The Frost Crown is an ancient possession of the House of Wulfheim, said to have originally been wrested from the head of a Hexenlander chieftain.  It occupies a Head magic item slot and confers a number of powers on its wearer.  First, it allows them to Speak with Animals at will, so long as those animals are wolves or kin to wolves (such as Worgs or Winter Wolves).  Secondly, it confers Cold Resistance 5 on the wearer.  Thirdly and finally, once per week the Crown can be used to cast the spell Control Weather, though you may only summon a blizzard, frigid cold, or hurricane force winds.  Anyone wearing the Crown undergoes a number of subtle physical and mental transformations.  Their eyes become colder and paler, gradually turning into a frosty ice-blue.  Their hair slowly turns silver and then white, and their teeth become curiously sharp.  Finally, they become increasingly haughty, aloof, and ruthless, and must make a DC 20 Will save every week or have their Alignment shift one step towards Lawful Evil.

The Frost Crown is worth 13000 gp.

If the heart is destroyed, the Count rises as a Mummy, equipped with Wolf’s Fang (this weapon doesn’t spread mummy rot, mercifully) if he still has it.

C30 – The Sepulchre of St. Severine’s Heart

This hexagonal crypt has few actual corpses – only a few carved niches with some mouldering skeletons in them.  However, at its very center lies a huge, gilded reliquary, opened to display a red, beating heart on a plush cushion.  The heart seeps a seemingly unending supply of blood that trickles down the reliquary and drains into small holes on the floor.  The sound of its rhythmic beat fills the chamber.

If Father Leopold/“Umberto” is with them:

The priest points his finger at the disembodied heart.  “It must be destroyed!  Cleanse this place of evil!”

If Brother Ambrose is with them, he will totally attempt to do this if the players don’t step up.  If they try to stop him, make sure to roll initiative in plain sight.  If Ambrose gets the drop on them and manages to destroy the heart – or if the players foolishly do so – this occurs:

The heart ceases to beat as the blade plunges into it and gouts of blood spew everywhere, a ceaseless sanguineous torrent gushing from the organ’s exposed orifices.  There is a sound reminiscent of a woman screaming, and a wave of utter despair ripples through you.

Father Umberto cackles, and suddenly the priest begins to change, his flesh sloughing off to reveal a ghoulish, cadaverous visage beneath, eyes glowing with an infernal light.

“You fool!” he declares.  “You have done what I could not.  Now that the heart is destroyed the dead can wake from their slumber!”

As he speaks, the bones in the crypt begin to stir, and half a dozen skeleton step down from their alcoves!

So, six skeletons here.  And a lot of undead elsewhere!  Anywhere that’s been sealed (sarcophagi, sealed tombs) takes the undead a little while to get through, but most of them will eventually find their way free.

Soundtrack

The Heart of Saint Severine is a powerful relic.  Anyone who carries it with them becomes Immune to Fear and gains a +4 bonus to saving throws against Death Effects and Energy Drain attacks.  In addition, Undead approaching within 10 ft. the Heart must make a DC 10 Will save or flee as if panicked (precisely as if they were just turned).  An Undead creature that makes its save cannot be affected by the Heart for 24 hours, but can be turned by those with the ability; however, Undead cannot touch the Heart, recoiling from it.  Any spell that creates Undead (Animate Dead, Create Undead, etc) fails to function if the Heart’s beat is audible (thus, a Silence spell negates this ability).  The Heart has an AC of 18 and 5 hp.  While in its gilded adamantine reliquary it has an AC of 24 and DR 2/-.  The Heart cannot be easily sold, but if presented to the Cathedral of St. Severine they will pay the characters 10000 gp.

Revenant

The Badhill Lads & Lasses

Black Hobbit

Soundtrack

The Badhill Lads & Lasses are a group of unscrupulous Halflings, originally from the Greyfarthing.  They’re a ragtag, unpleasant band of brothers, sisters, cousins, second-cousins-twice-removed, and other relatives, somewhat inbred from long years of cousin-marriage in the tunnels of Badhill, and they’ve acquired an unsavoury reputation over the years as thieves, thugs, poachers, and bandits.  The current group have come to Hexenburg following rumours of gold and other treasures in the crypts.  They’re led by the vicious Foxglove Twins, Trahald and Smygel (statistics can be found in the Appendix), and consist of six toughs armed with knives and clubs.  They form two groups of four – one Twin and three Lads or Lasses each – and begin combing the catacombs in search of treasure.  If they encounter the adventurers they will not hesitate to slit their throats and steal everything they’re carrying down to their last stitch of clothingThey might also be bartered with or intimidated, but any alliance formed with them is temporary at best.

If the Badhill Lads & Lasses attack, they will do so stealthily, avoiding direct confrontation, as described below (for example):

A knife twirls out of the darkness towards you, followed closely by a pair of shifty-looking Halflings in battered leather armour, their hair greasy and wild, their faces scarred and mean-looking.  The pair have a slightly inbred look, with exaggerated facial features and widely spaced eyes – in fact, you might have mistaken them for a pair of Goblins if it weren’t for their unshod, furry feet!  The pair both brandish cruel-looking knives.

Two will attack from the front while one of the Foxglove Twins and a third tough flank.  Badhill Halflings run away if injured for more than 5 hp – they’re total cowards.  But they regroup quickly and attack in numbers if required, and they’re certainly not above setting ambushes and fighting dirty…

St. Severine’s Skull: Hexenburg Castle – Chapel and Rectory

Clarke4

Soundtrack

The chapel’s main bulk is a squat, round structure with a domed roof and a small, pillared entrance.  The building looks extremely old, but the small bell tower attached near the entrance and the rectory near the back are obviously much more recent additions.  The place exudes an eerie, horripilating feeling, making the hair on the back of your neck rise.

The Chapel is one of the most important parts of Hexenburg for characters to visit, as it contains many valuable items that will assist them greatly against the creatures elsewhere in the Castle, including some potent magical weapons and valuable scrolls, some of them considerably more potent than those usually available to 1st level characters.  However, it is far from a “safe” area for characters.  Its catacombs are currently devoid of undead, but the hundreds of bodies within will rise if the Mummified Heart of Saint Severine is destroyed, and a Huecava, Father Leopold, lurks in the chapel itself.  This crafty creature uses its Disguise Self ability to appear as Father Umberto, the priest who came here with Brother Ambrose and Sir Albrecht.  It killed the real priest (his body can be found hidden in the wardrobe in CH 8), and will try and lure characters down into the catacombs to destroy the Heart.

During the night, when its true form is revealed, the Huecava retreats to the catacombs and evades characters if possible.

For more details on Father Leopold, see CH3.

Chapel

CH1 – Narthex

The narthex of Hexenburg’s chapel is a shadowy antechamber covered in sacred murals depicting scenes from the life of Saint Malus, a warrior saint, including an image of the knight battling a demonic sea serpent and converting a community of Trolls.  These murals are now peeling and cracked, and some of the figures have been deliberately defaced.  A doorway to the left opens onto a stair, presumably leading up to the belfry.  Up ahead, a pair of double doors leads into the church itself.

CH2 – Belfry

The bell at the top of this belfry is cracked and badly tarnished, and the entire belfry is slick with guano.  Looking out from the bell-tower you can see over the walls of Hexenburg into the dark, snowy forest beyond.

Perception DC 10 to note the dozens of bats roosting here, if it’s the day.  If at all disturbed they become a bat swarm which will harass and attack characters until they descend the bell tower again.

CH3 – Church

Duomo

The church consists of an expansive dome supported by a series of columns, with a few broken, rotting pew scattered about the floor.  The place is windowless and very dark.  A fresco depicting the horrors of Hell on one side and the glories of Heaven on the other is visible overhead.  The celestial half of the image is swathed in cobwebs and dust, the faces of angels made grey and dim, with age, giving them the appearance of winged corpses, grime darkening the clouds and marring the empyrean purity of the sky.  Curiously, the infernal side of the fresco seems remarkably untouched, the grimacing demons and tortured souls still terrifyingly vivid.  There is an altar here, and a number of statues of Saints, but they seem out of place amongst the ancient stone columns and heathen darkness of the temple.  Several of the statues have been decapitated or otherwise disfigured, and the altar itself has been thoroughly defiled: sitting upon it in a pool of dried blood is a decaying human head, and a disturbing, antlered idol formed from wicker, human bones, and the skull of an enormous stag presides over the desecrated shrine.  Two arched doorways lead to other chambers of the desecrated chapel, and a third leads onto a stair winding down into the earth.  A small wooden door is marked “Rectory.”

Resting here is a very bad idea.  The place is Unhallowed and permanently Desecrated.

There is some treasure here: inside the altar in a locked compartment (DC 25 to pick, or use the silver key), within which is stored 4 flasks of holy water, a holy text, and a consecrated masterwork dagger.

If it is still daylight, Father Leopold will rush up the stairs from the catacombs, disguised as Father Umberto:

priestClarke 3

Suddenly, a bedraggled-looking figure rushes up the stairs from the depths below, bringing with him a reek of the grave; he is so haggard that for a moment you take him for some undead monstrosity, but then you see he is alive.  The man is garbed in torn ecclesiastical robes and has tonsured hair.  His eyes are wide and frightened, his face contorted into an expression of horror.  He stumbles into the church.

“Thank the Light!” he exclaims.  “I did not think I would ever see another living soul again.”  He pants, recovering his breath.  “My name is Father Umberto,” he says.  “And I must beseech you, in the name of all that is holy, to come with me.  I have found the source of the corruption that plagues this castle – an undead heart, reanimated by some vile necromancer.  I would have destroyed it by my own hand, but the place is haunted by evil spirits – I barely managed to escape their clutches.  We must destroy the heart, and cleanse this place of evil once and for all!”

“Father Umberto” will insist on leading the characters down into the catacombs.  He grows very nervous and agitated if the characters wish to rest.  Play him as an utterly earnest and desperate character who seems to sincerely believe the heart is evil.  He possesses the silver key.

The father may have to make several Bluff checks (he has +8 to this skill, having lost 6 ranks from Stealth – Stealth is +6).  If the players want to roll a Sense Motive check, it’s DC 20 to catch a strange gleam in his eyes or feel that there’s something not quite right here.

If the party has Brother Ambrose with them, he’ll be convinced this is the real Father Umberto, and will urge the party to follow him.

Father Leopold will try and get the characters away from the rectory and other rooms, and if they start messing around with his old bedchamber or study he gets very agitated indeed.

CH4 – Baptistery

A baptismal font stands at the centre of this octagonal chamber.  The walls of the baptistery are adorned with murals depicting scenes from the crusades – images of heretics and heathens being slain by crusaders, hundreds of them impaled on stakes or decapitated, their heads piled high.  The gruesomeness of these murals is unusual, and, curiously, these murals look quite clean and intact compared to those in the narthex.  The font itself is ornate, crusted with sculpted images of cherubim, though in the gloom their faces look strangely cruel rather than beatific.  There is water within.

The baptismal font has been desecrated as well; it now produces unholy water.  In addition, anyone drinking from the water must make a DC 15 Will save or shift to an Evil alignment for 1 hour of real/player time.  Hand the player a note with this change (do not announce it out loud).  The character becomes filled with violent impulses and the desire to sacrifice his or her companions to the forces of darkness.  While under the effects of the water, the character will not be attacked by undead in the chapel or catacombs.

If a scroll of Consecrate or Bless Water is used on the font, it is restored to its prior state and will contain holy water instead of unholy water.

CH5 – Sacristy

This looks like a sacristy, where holy vessels are kept, with many prayer candles, linens, a huge, golden chalice set with rubies, incense censers, a thick book, and phials of anointing oil.  Unlike the main chamber of the chapel, this room looks undisturbed.

12 phials of anointing oil, a Hallowed Chalice worth 600 gold pieces, and a Tome of Hymns.  A Bard who studies the Tome, which takes 48 hours over at least 6 days, adds the spells Bless, Bless Weapon, and Bless Water to his or her spell list.

CH6 – Reception Room

Soundtrack

This small but well-appointed reception room might once have been quite comfortable, but now the hearth is cold, the chairs and divans are rotting, the thick rugs mouldy, the wall hangings in tatters.

CH7 – Vestry

This cloakroom is filled with the rotting remnants of robes and other holy vestments, held on pegs lining one wall.  Spiders have infested the robes, and their webs shroud the ceiling.

A spider swarm lurks in the robes.  There is little of value here save for a pair of Healer’s Gloves tucked in the pockets of one robe.  There are lots of ecclesiastical outfits, but they’re in very poor condition.

CH8 – Chapel Library

old books

This door is swollen shut – DC 20 Strength to force.

This large, square chamber is lined with shelves containing a variety of mouldering texts.  Many of them look like nothing more than chapel archives, but others are books of scripture and Apocrypha.  Some portions of the shelves contain stacks of old vellum scrolls instead of bound books.  There’s a small work-table here with an unlit candle.  A high window admits light, and a ladder allows access to the higher tomes.

Make Perception checks (stirges have +16) to notice the colony of 4 stirges roosting on the ceiling.  Otherwise the creatures will attack if the books are disturbed:

There is a fluttering, squeaking sound as four grotesque bat-like creatures with insectoid heads and juddering proboscises swoop towards you!

There are a lot of valuable objects here.  First, the following scrolls can be found:

4 Scrolls of Hide from Undead (1st level)

6 Scrolls of Protection from Evil (10th level)

3 Scrolls of Consecrate (3rd level)

3 Scrolls of Dispel Magic (5th level)

2 Scrolls of Speak with Dead (5th level)

2 Scrolls of Remove Disease (5th level)

2 Scrolls of Remove Curse (5th level)

2 Scrolls of Dismissal (10th level)

1 Scroll of Dispel Evil (10th level)

1 Scroll of Hallow (10th level)

1 Scroll of Raise Dead (10th level)

1 Scrolls of Cure Moderate Wounds, Mass (11th level)

The library also contains several books that may be of interest.  The first is a book on demonology, the Daemonomicon, which grants characters referring to it a +4 bonus to Knowledge (planes) check to identify evil outsiders (it also allows them to make such checks untrained).  Another is the Book of Martyrs, a text describing the lives and martyrdoms of many Saints, including Saint Severine.  If a character spends 8 hours studying this text, they acquire all of the knowledge normally gleaned from a Knowledge (religion) check concerning the Saint, as outlined at the start of the adventure (this includes the fact that her heart reputedly still lives!).

crucify 2crucify

There are also about a dozen holy texts here that are still mostly intact, each worth about 10 gp.

CH9 – Priest’s Chamber

The iron-bound door to this room is locked (DC 25 to pick, DC 25 to force, or use the silver key).

This small but well-appointed room includes a four-poster bed, and a tall, oak wardrobe.  Unlike most of the furnishings in the chapel and rectory, those here are still fairly intact.  In one corner, someone has built a small, macabre shrine with an improvised altar-stone upon which is lain the corpse of a rat, set before a kind of fetish or totem, a crude figrue made from fur and bones.

Perception DC 10 to notice the still-wet blood seeping from the wardrobe.  Within is the corpse of the real Father Umberto, and half a dozen ecclesiastical outfits.

The shrine is dedicated to a dark power of vermin and pestilence, the Prince of Decay, Crom Mogg.

CH10 – Priest’s Study

The iron-bound door to this room is locked (DC 25 to pick, DC 25 to force, or use the silver key).

This room appears to be a study, with a bookshelf and a writing desk.  On one wall is a portrait of a stern man in priestly robes, with piercing black eyes.  An inscription on the frame reads “Father Leopold.”  There are a few scattered papers strewn across the desk; most are badly decomposed, but some might be legible…

There’s a page here from Father Leopold’s Diary:

Chapel Document

St. Severine’s Skull: Hexenburg Castle – Outer Bailey

Outer Bailey

Outer Bailey

Soundtrack

The outer bailey of Hexenburg was devastated by the invaders: most of its outbuildings and workshops were burnt to the ground, leaving only ashes and charred beams.  Near the center of the courtyard a great pile of corpses must long ago have been heaped and then burnt, leaving a tangle of blackened skeletons.  Several structures, however, managed to survive the depredations of the marauders: the chapel, a round building of obviously ancient design, a squat armoury, and two towers, one tall, shadowy, and stark, likely of Imperial design, and the other slightly shorter but more ornate.  At the far end of the courtyard a gate leads into the inner bailey, where the keep is visible.  Snow continues to fall, though the walls provide some shelter from the chill wind.

Knowledge (religion) or (history) DC 15 to recognize the chapel as a formerly pagan temple that must have been converted into a church.

Random Encounters

The Outer Bailey is the perfect place for random encounters.  Camping here is foolish, and will inevitably draw the attention of the Castle’s denizens.  Roll on the following table (1d12) for random encounters:

Roll d10 Result
1 A Goblin patrol consisting of 5 Goblin warriors (3 archers, 2 melee), who retreat if they take any casualties.
2 3+1d4 Bandits sheltering here temporarily.
3 A Barghest and 3 Goblin warriors (principally melee).
4  An Ettercap from the Library Tower and 3 small monstrous spiders.
5  2 Bugbears.
6  A rogue Grick from the catacombs.
7  Hunting Tentamort.
8  Slime crawler from the crypts.
9  Dire Bat.
10  1d10 Giant Cockroaches.

Mixing and matching from appropriate results can work as well – like throwing a Barghest, a Bugbear, and a handful of Goblins at the players, for example.

Well

This crumbling stone well has rotten ropes and rusted mechanisms.

The water in the well is stagnant and fouled, unfit for drinking.

The Cult of the Withered Hand

cultists

Soundtrack

The Cult of the Withered Hand is a group of depraved fanatics who arrive at Hexenburg, servants of the Misshapen God and Lord of the Withered Hand, known also as the Aberrant One, Scorrathoth the Twisted.  Their leader is the demented former priest known as Father Melchior; his right hand is the maniacal Sister Gabriella, and together they lead a band of deranged rabble consisting of three dark disciples and seven rank-and-file cultists.  They have journeyed to the ruins in search of a book known as the Book of Bile, a grimoire which can be found in the Library Tower, as well as any other infernal artifacts they might discover.  They will probably not cooperate with the party, but evil characters, good liars, or characters who know how to strike a deal might be able to reason with them.

Statistics for Melchior and Gabriella are included in the Appendix.

The best way to introduce the cult is to have the adventurers witness they arrival from the gatehouse, the walls, or from a watchtower.  Alternatively they could glimpse their arrival from a window in the Black Tower or Library Tower.  In any case, wait until the characters have explored a little before introducing the cultists.

Arrival

There is a sound of clopping hooves on the path as a carriage drawn by a pair of pale, bony horses rattles over the drawbridge and into Hexenburg’s outer bailey.  A group of men and women in ragged, greenish-brown robes accompanies the carriage, either riding haggard-looking mounts of their own or trudging through the wet snow on foot.  They’re a miserable, bedraggled looking lot, with sallow features; some look to be afflicted with some kind of pox or rash, and several have unwholesome-looking tattoos.  One carries a gnarled wooden standard mounted with what looks like a bony human hand at its tip.  They carry flails, daggers, handaxes, or slings.  Many of them seem slightly deformed, or to be missing limbs or other body parts.

As the carriage rumbles to a halt the driver opens the door, and two people get out: one a robed, stunted-looking man with an extremely long, matted beard, yellowed teeth, and a shambling gait, the other a tall, gauntly elegant woman who would be cadaverously beautiful were it not for the tumourous growths mottling half of her face.  The two seem to be conversing, speaking to their clustered followers.  There are about a dozen of them in total.

Perception DC 20 to listen in:

“…must find the Book of Bile as soon as quickly as we can,” the bearded man is saying.  Despite his small stature he seems to command a great deal of authority.  “The Withered Hand will guide us, if we trust in our Lord, but there are things here which will not welcome our presence.”

“Of course, Father Melchior,” the woman says.  She turns to the gathered rabble.  “You heard the Father.  Form groups of three and begin searching the grounds.  The tome may not be in the library tower; we know that Count Manfred von Wulfheim kept a number of valuable texts in his laboratory.”

The cultists do as she says, with the groups looking like this:

Group 1: 1 Disciple, 2 Cultists

Group 2: 1 Disciple, 2 Cultists

Group 3: Gabriella, 1 Disciple, 1 Cultist

Group 4: Father Melchior, 2 Cultists

A Note on Spells

The Disciples have the following spells prepared:

1st: Doom, Inflict Light Wounds, Ray of Sickening (DC 12)

Sigil’s Most Wanted

I recently made a bunch of wanted posters for my players as handouts – the law has finally caught up with them after a year and a half of hijinx in the City of Doors.

Wanted Pandemonium Six

The original party met in the Howling Land of Pandemonium; due to their exploits the Sigilian authorities have dubbed them the “Pandemonium Six.”

Wanted Alfgrimr

Alfgrimr was a character made by a Planescape veteran who, unfortunately, has now left the campaign (due to graduating from library school).  Alfgrimr was a very, very odd character – a water genasi Cipher of the Transcendent Order (which meant that if his player said he took an action, even in jest, he had to take that action), he was obsessed with achieving immortality and thus was always collecting odd bits and pieces along his journeys in the hope that they would extend his lifespan.  He was also crazily ruthless and disturbingly creative.  For a period another character possessed a Helm of Telepathy – which, at our table, is now represented by a paper crown worn by the player whose character is wearing the helm – and Alfgrimr’s player would periodically pass the telepath unsettling notes, the “ambient thoughts” rolling around in Alfgrmir’s twisted consciousness.  He also died a lot, and eventually became a proxy of the Norse god Baldr.

Wanted Kets

A catfolk Rogue and former street urchin, Pockets has a history that feels a bit like something out of a Dickens novel crossed with Selina Kyle and Garrett from the Thief series.  The abandoned daughter of the former Cat Lord of the Beastlands, “Kets” is a hardened, embittered seventeen-year old pickpocket turned upscale burglar who usually is about as jaded as they come.  She fights with a rapier and a winxy pistol, an ensorceled firearm she picked up in a Demiplane modeled on Lewis Carroll’s Wonderland.  She’s defiantly True Neutral.

Wanted Gwendolyn

Gwendolyn is the animal-lover of the group and one of the two Good characters.  Along with Belric, below, she helped create a giant, green super-intelligent hog monster that grows bigger the more it eats and is now housed in an extradimensional warehouse in the Sigil’s slums, hence her moniker “Swine-Mother,” bestowed on her by a group of Xoasitects.  She’s a half-elf Ranger/Druid and so serves as the party’s main healer.  She often tends to spend a healthy portion of a given sessional wild-shaped into some sort of bird.  She’s also slightly deranged from wearing a Helm of Telepathy for a bit too long.  Oh yeah, and she’s wearing a symbiotic Corset now…

Wanted Klaira

Klaira is the party’s Bard/Gunslinger and the only other Good character, so she’s forced into the role of “group conscience” pretty frequently.  She’s also on the run from Unseelie bounty hunters who want to return her to a twisted fey aristocrat who previously kept her around as an enslaved storyteller, Scheherazade-style.  During the Savour of Madness adventure in Ravenloft she got grafted with a reptillian tail remeniscent of a chameleon’s.

Wanted Belric

Belric is a Halfling… and also the child of an Olympian demigod from Arborea.  He’s a Sorcerer who specializes in lightning spells, a former Athar turned Sensate, and easily the whackiest character in the party – he’s got all the appetite of a Hobbit and a taste in mind-altering (and body-altering) substances that would match William Borroughs.  He eats and drinks everything: mysterious chaos-cheese from Limbo, age-reversing potion, Alignment-altering liquor, animal petitioners on the Beastlands, and dozens of other morsels and tinctures.  Chaotic Neutral to the core.  He was reincarnated as a Kobold for awhile.  He’s also bedded fallen celestials, fairies, and probably a few things I’ve forgotten about…

Wanted Achaia

Achaia is a Fetchling Rogue/Shadowdancer with a Stealth bonus so high I often don’t even call for Stealth checks anymore.  She can shapeshift and hide in plain sight, and steals pretty much anything that isn’t nailed down, which all goes into a capacious bag of holding.  She’s usually pretty self-serving but seems to have a soft spot for children and simialrly vulnerable types, going out of her way to aid the downtrodden and neglected.  The hat was filched from the Mad Hatter’s felinoid house.  She’s also got a nice little time-manipulating stopwatch a Paladin polymorphed into Goblin form gave her after an escapade on Acheron.

Wanted RulgaRulga was a character made by a player who unfortunately had to leave the campaign, but she was great while we had her.  A Dwarf Monk and member of the exacted Fated – who are something like Planescape’s Objectivists and Nietzscheans – she served as a major voice of reason (she was also the only Lawful character in a party full of Chaotic types).  She eventually met Arthur Pendragon in Avalon on Elysium – he was waiting to be recalled to Albion on the Prime Material Plane, but the party somehow convinced him to join them, and over time the two had an extremely strange off-kilter romance that survived several reincarnations.

Planescape Soundtracks

The main game I’m running these days is a Planescape campaign (for those that know the setting well, I’ve set it before the Faction War, using all the AD&D boxed sets and a lot of my own notes; for those that don’t know the setting well, you can find out more here). I run the setting very much as a sandbox: we’ve got a big, sprawling map of Sigil in the middle of the table that the players can interact with, and at any given time there’s about half a dozen plot-threads they can engage with and intertwine. Planescape is a challenging setting to run for a lot of reasons, but one of the biggest is tone.

ladyofpain

As I interpret the setting, there are two major stylistic/generic elements at play in Planescape: noir and myth. On the one hand you’ve got a sort of gloomy urban fantasy vibe. Planars (especially Sigilians) cultivate a kind of hardened, jaded cynicism – they’re hardboiled. The world of noir is, in the words of famous noir critics Borde and Chaumeton, “oneiric, strange, erotic, ambivalent, and cruel.” The noir element is dark, surreal, world-weary; it’s about conspiracies, mysteries, dubious motives, and off-kilter misadventures. On the other hand there’s the myth element, which is kind of the opposite of noir – it’s about big, larger than life heroism and archetypes, spiritual forces, allegory, and ritual. These things are, in some sense, ultimately and inescapably opposed. Noir is a nihilistic genre about existential crisis, about grappling with the dark sides of the psyche in a universe without the comforts of some greater meaning or telos; there’s horror and terror and awe, but people in a noir universe are detached from these emotions, perhaps almost in contempt of them. Myth, on the other hand, is all about greater meaning, all about sublimity and intensity. Myth has Heroes in the Cambellian vein; noir has anti-heroes.

This noir-mythic tension – which, to me, is endlessly fascinating and rewarding to play with and mash up – brings me to the actual purpose of this post, which is music. I use music in all of my games these days. The right music can set the tone perfectly, while the wrong music can wreck the tone completely. A Planescape soundtrack requires eclecticism: you’re in Acheron one minute and Elysium the next, and walking down a street in Sigil, Devils rub shoulders with Elementals and lycanthropes and sentient robots. I also want the music to reflect both elements of Planescape’s ethos, the interplay between dark noir fantasy and myth.  I favour video game soundtracks for my games, because by their nature they’re designed to be ambient and repetitive, but I also use soundtracks from movies and other sources. So, without further preamble, here’s my Planescape soundtrack:

Planescape: Torment Soundtrack – a good all-purpose score specifically designed for the Planescape setting.

Grim Fandango Soundtrack – excellent for taverns and clubs, and a nice alternative to the stereotypical quasi-medieval harp music you often here in taverns in rpgs.

The Void Soundtrack – one of the most hallucinatory soundtracks I’ve ever heard,with a mystic, dream-like tone shot through with a lot of unease.  The Turgor Theme
is especially brilliant.

Sherlock Holmes Soundtrack – especially good for frenetic chases, back-alley fights, and street scenes.  I have mixed feelings about the films (in essence: superb popcorn cinema, god-awful as Holmes adaptations) but the soundtrack is quite marvelous.

Alice: Madness Returns Soundtrack – brilliant for dark doings, twisted realities, Kafkaesque trials, gigantic machines, Wonderland-inspired vistas and the like. I use this one a lotDollhouse is probably my favorite track.

Zeno Clash Soundtrack – for suspenseful moments, fights, and exploration of alien wildernesses. Another one I use very frequently.  Danger in the Mist is a particularly useful track in crazed alley-labyrinths haunted by Chaosmen who’ve decided to adopt the personae of ravenous hyenas, or fungal forests in the Plane of Ooze infested by savage vegepygmies, etc.

Riven Soundtrack – for conspiracies, forgotten temples, and moments when the players glimpse the wheels-within-wheels play of power and pain that keeps Sigil from flying apart at the seams. I’m especially partial to the Moiety Theme which has a wonderful aura of sinister mystery and immense age to it.

Vampire: The Masquerade – Bloodlines Soundtrack – a nice, dark fantasy urban soundtrack, especially good for demonic dance clubs.

Thief Soundtrack – for sneaking around, naturally. A rich mix of ambient sounds, ominous trills, and vague discord.

Dishonored Soundtrack – more good city music. A very melancholic sort of soundtrack, to be used in quieter moments.

Amnesia Soundtrack – for my annual month-long Ravenloft segments and occasionally in other especially horrific situations. I use this one sparingly.

Beetlejuice Soundtrack – for encounters with Xaositects (who I interpret as Dadaists and Absurdists) and Limbo. The main theme is brilliant in chaotic, madcap situations that call for a comedic touch.

Rune Soundtrack – for moments of mythic horror, cold planes, Ysgard, and anything involving Dwarves.  Also some good pitched battle music.

Sin City Soundtrack – I actually use this one fairly rarely as it’s a bit too recognizable in places, but I would like to make greater use of Old Town in the future.

Note: obviously the big sonic/thematic influence I’m neglecting here is punk, which is also important for the setting.

St. Severine’s Skull: Hexenburg Castle – Gatehouse

Gatehouse

Soundtrack

Grugnar, the Gatekeeper

The Gatehouse is the lair of a badly deformed Ogre, Grugnar Skintaker, Gatekeeper of the Castle – a twisted wretch, shunned even by fellow Ogre-kind, who tries to hide his hideous deformities with garments made from humanoid skin.  Grugnar will probably become aware of the characters before they become aware of him, and will begin stalking them through the ruin.  He particularly prizes those with nice skin (Elves, Half-Elves, and those with high Charisma scores) and ignores anyone with bad or discoloured skin (Half-Orcs are probably safe).  He will try to pick off characters one by one rather than attacking them en masse, but if they stick together he will eventually simply attack them.  If wounded at all severely, he immediately retreats.

Note that Grugnar has a tenuous alliance with the Gorefeaster Goblins who inhabit the keep – though not a member of the tribe, he will open and close the gates, portcullis, and drawbridge as the Goblins require, and pays occasional tribute to the Goblins (mostly in the form of gold taken from his victims).  In exchange, the Goblins let him keep to himself and stay out of the Gatehouse.

Grugnar’s statistics appear in the Appendix.  Grugnar has a copper key that opens any door in the Gatehouse.

Within the Gatehouse, emphasize an atmosphere predominantly of emptiness.  Throw in strange sounds – doors opening, footsteps, a claw scraping against stone, a low moan.  Some of these “scripted” sounds can be found below as examples.  Call for random Perception checks, with the following results:

DC 10:

You could swear you heard something moving outside the room, and briefly glimpse a shadow flicker past the doorway.  You catch a whiff of some rank, animal fetor.

DC 15:

You hear a shuffling footstep somewhere behind you, as well as a ragged, indrawn breath.  Someone, or something, is nearby, but out of sight.

DC 20:

Out of the corner of your eye, you catch a brief glimpse of something – a hulking, vaguely humanoid shape, hunched over and grotesquely proportioned – shambling through a doorway.  The second you look towards the door the shape is gone, so quickly and quietly you wonder if you imagined it.

Grugnar himself:

A huge, hunched monstrosity, at least nine feet tall and muscled like an ox, lurches out of the shadows.  The creature is misshapen and twisted, its body contorted strangely, its back bent, its arms long and gangly.   It smells abominable, like a slaughterhouse, an open grave, and a wild animal, a vile fetor mixed into one noisome stench.  The thing is garbed in a monstrous patchwork garment stitched together from the tanned flesh of many humanoids.  This abhorrent outfit includes a hideous fleshy mask.  Beneath the thing’s skin-suit you glimpse a mottled, hairy hide covered in disfiguring warts, boils, and growths – it’s as if the brutish thing were trying to cover up its own ugliness with stolen flesh.  The bestial monstrosity brandishes a flaying knife in one clawed hand and a spiked chain in the other.  It gnashes yellowed fangs and shambles towards you!

Gatehouse

G0 – Drawbridge

As you approach the drawbridge and the gatehouse you notice tracks in the snow, leading towards the Castle.  They must be fairly recent as the snow is still very fresh; the footprints are unusually large and strangely shaped.

The drawbridge groans as you step onto it.  The portcullis is up, and the huge, wooden doors are splintered and broken open.  Above you, several murder holes are evident, where defenders would have thrown down stones, quicklime, or boiling water down on foes.  Past the double doors lies the Castle’s first bailey, an open courtyard with several outbuildings, while to either side, there are two more wooden doors leading into the gatehouse itself.

The doors into the gatehouse are shut, requiring a DC 20 Strength check to open or a DC 20 Disable Device check.

Knowledge (engineering) DC 10:

Judging from the dressed stonework here, the gatehouse was probably built well after the days of the Empire.

G1 – West Guard Room

Soundtrack

Badly rotten tables and chairs litter the floor here, and putrescent tapestries depicting a heraldic wolf’s head with red eyes and a lolling tongue adorn the stone walls.  Some of the furnishings seem to have been actively smashed to splinters.  A door has been torn from its hinges by some terrible force.  It lies on the ground; curiously, it is marked by what look like claws rather than axe-blades or swords.  Beyond the gaping doorway is a spiralling stone stair.

There are a few badly rusted shields lying about here, having fallen from their brackets on the wall.  There’s also an old lantern on one of the tables here, though it doesn’t look like it has any oil left.

Perception DC 15 to hear what sound like footsteps creaking on the floorboards above.  The lantern is of the hooded variety.

G2 – East Guard Room

This spare, rectangular chamber might once have been a guard room, but it’s become the lair of some beast.  Gnawed animal bones in the hundreds are strewn across the floor, culled from birds, weasels, elk, and even what look like bears – whatever ate these creatures, it was capable of taking down large predators.  There also seem to be a few human bones mixed into the macabre heap, and some torn scraps of clothing.  An animal musk mingles with the scent of decay here.  There’s one door, ajar, leading into a spiralling stairway.

A search of the bone-pile turns up 14 silver pieces and a battleaxe.

G3 – West Barracks

Sagging bunk-beds with tattered linens line the walls of this long chamber.  Each has a chest at its foot; many stand open.  Dark, crusted stains mar the woodwork, and it looks like someone has scrawled a message in blood on one of the walls, though it’s written in jagged, uncouth runes.  A handful of cracked, scattered bones litters the floor.

Anyone who can read Aklo (or make a DC 20 Linguistics check) can read the message:

“All Hail the Mistress of Slaughter.”

Anyone who reads this out loud accidentally invokes a spell similar to Rage upon themselves (Will DC 17 to resist) and attacks the nearest ally for 1d4 rounds.

There is little of value here, but a thorough search of the chests turns up a spare suit of chain mail, a light flail, and 26 silver pieces.  Locked in one chest (DC 20 to open) is a masterwork silver dagger.

G4 – East Barracks

If the players have a light source when they enter this chamber, note that cockroaches scuttle away from the light.

Vermin have taken up residence in this former barracks, infesting the mouldy remains of the furniture. Cockroaches in particular seem grotesquely abundant here, chittering and rustling as you enter.  A skeletal corpse lies slumped against one wall, its mail hauberk heavily rusted.  In its bony hands, the corpse clutches what looks like a sacred talisman.  There are several unlit torches in brackets along the walls.

The talisman is of Saint Bastiana and functions as an Amulet of Natural Armour +1 to any of the faith, or alternatively of a Lawful alignment.  However, disturbing the corpse in any way provokes a cockroach swarm:

As you touch the talisman, the skeleton’s bones rattle, and suddenly, a swarm of cockroaches seethes forth from beneath the corpse’s armour, coursing over your limbs, creeping beneath your clothes, their mandibles worrying at your flesh!

Note that as per 3.5 I’m using rules for torches and lanterns here – a swung torch deals 1d3 and a lantern, if broken, 1d4.  The cockroaches don’t like light, so a strong light source like a lantern or Light spell, appropriately brandished, makes them flee into the room’s corners.  Flasks of acid and alchemist’s fire also work, as do spells like Burning Hands and the like.  The characters’ best strategy may be to just retreat; the cockroach swarm won’t follow them down the stairs or through a door.

It’s possible to get the talisman out without provoking the swarm, but it takes a Sleight of Hand check (DC 15).

praying handswoodcut-of-skull-snake-and-hourglass-middle-temple-library

G5 – Winch Controls

A large, badly rusted winch stands at the center of this chamber; at the far end of the room is a windlass.  Cut in the floor are several circular murder holes.  Some old bloodstains crust the floor.  Several buckets full of stones are tucked into a corner.

The bloodstains lead into G7.  The winch is used to operate the portcullis, the windlass for the drawbridge.  Currently the drawbridge is down and the portcullis is up.

G6 – Trapped Archer’s Gallery

You enter a long gallery with a series of arrow slits along one wall, allowing archers to target anyone on the drawbridge.  Two mouldering skeletons are slumped against the far wall, clutching bows.  Arrows are strewn about the floor, and an old smear of blood leads to a door.

There are 6 cold iron arrows and 34 arrows here for those that want them.

A gut tripwire here activates a crude crossbow trap.

G7 – Arsenal

This room looks to have once been an arsenal, but it’s been thoroughly looted.  Empty weapon racks and brackets are evident, but little of use remains: half a dozen rusted spears and a few halberds, and a handful of brittle-looking bows.

All of these weapons have the “broken” condition.

G8 – Armoury

The door to this room is unlocked, but trapped – upon opening it, several large, badly rusted blades swing down from the ceiling to strike any stepping through, similar to a scythe trap.

Old suits of armour, badly rusted, can be found in this chamber: chain shirts, breastplates, helmets, greaves, gauntlets, and other bits and pieces, some of them still on their racks, others scattered about.  Dozens of shields and bucklers are scattered around as well.

4 chain shirts, 3 suits of chain mail, 3 suits of scale mail, 2 breastplates, 1 suit of splint mail, 1 pair of spiked gauntlets, 6 large steel shields, 4 small steel shields, and 8 bucklers can be found here.

G9 – Storage

The heavy wooden door to this room will not open easily, as it’s been barricaded.  It takes a DC 22 Strength check to force it open.  The blood trail leads here.

You finally force the door open.  Inside, you realize the door had been barricaded – there were shelves, crates, and other objects heaped up against it.  The chamber here looks to be a storage room.  There are several jars of lantern oil, a number tools and nails, torches, linen, spare parts for the winch, and a significant quantity of spare timber.  There are also some bandages and other healing supplies.  The blood-stain stops at a mouldering old skeleton in a badly rusted hauberk, an arrow protruding from its bony ribs.

There are 6 jars of lamp oil here (1 pint each), 20 torches, and a healer’s kit.  The skeleton has a chain shirt and a masterwork arrow sticking out of it.

G10 – Archer’s Gallery

Judging from the arrow slits along one wall, this is an archer’s gallery, used to pepper foes on the drawbridge with arrows.

A patch of the floor in this gallery is weakened.  Unless a character has Trapspotter or Stonecunning, they don’t get a Perception check automatically; it’s DC 20 to detect otherwise.  The hazard requires a Reflex DC 20 to avoid and deals 2d6 falling damage, depositing characters in G6.

steps

G11 – Mangonel Storage

Spare parts for mangonels are stored in this chamber – beams, axles, counterweights, and other components.  Now these parts are beginning to succumb to rot, exuding a pungent odour.

G12 – Spiked Room

The door to this room is locked; Grugnar has the copper key which unlocks it.

Someone has fixed long, wooden spikes to the floor of this room.  The spikes appear to have been smeared with a dark substance.

Anyone straying to the chest in G16 may end up here.  The spikes are smeared with small centipede poison (Fort DC 11, 1 Dex damage, 1/round for 4 rounds, 1 save cures).

G13 – Crossbow Armoury

This door is locked (DC 20).  The copper key opens it.

During the attack on Hexenburg, this room must have been neglected.  Its walls are hung with crossbows, most of which are in remarkably good condition, ranging in size from heavy crossbows to small hand crossbows.  Barrels of bolts are arrayed about the walls.

There are about 1000 bolts, 20 heavy crossbows, 20 light crossbows, and 10 hand crossbows here.

G14 – Heap

This room might once have been an armoury of storage chamber, but its previous contents have been cleared out.  A makeshift bed has been made from heaped grass, straw, and other material.  Some cracked bones are scattered about as well, along with a half-eaten human corpse.  Hideously, it looks as if the corpse was flayed before being partially eaten – the man has no skin.  Piled in a corner of the chamber is a mound of clothing scraps, leather tatters, and other bric-a-brac, including a number of old weapons and bits of jewellery.

Two gold rings (25 gp each), a silver ring (5 gp), and four copper rings (1 gp each), plus a silver broach set with a bloodstone (75 gp), can be found here, along with a dagger, a shortsword, and a masterwork longsword.

G15 – Centipede Room

In this chamber, a pair of overgrown centipedes the size of cats scuttle over the corpse of a small, ponty-eared, sharp-toothed humanoid – a Goblin.  The creature’s flesh is discoloured and blotchy from hundreds of tiny bites.  It clutches a morningstar in one hand and a ring of keys in another.  The centipedes seem to have made this room their nest – amidst a heap of rotten timber they’ve laid dozens, or perhaps hundreds, of glossy white eggs.

The centipedes are aggressive and will attack anyone entering.  The Goblin has 8 silver pieces and a ring of keys (copper, silver, black iron, bronze).  It is from the Barghest-led tribe that dwells in the Dungeons.

G16 – Trapped Room

The wooden floorboards of this room are scuffed and bloodstained.   Near the far end of the room is a large, wooden chest, open.  Inside you can glimpse a glimmer of silver.

Grugnar has set a trap in this room.  The chest contains 142 silver pieces and 42 gold pieces,  However, the floorboards near the trap have been weakened (Perception DC 20 on a trap search, Disable Device DC 20).  Anyone stepping on them must make a DC 20 Reflex save or suffer 1d6 falling damage, plus 1d4 spikes (+10 attack, 1d4+2 each) as they fall into G12.  These spikes are smeared with small centipede poison (Fort DC 11, 1 Dex damage, 1/round for 4 rounds, 1 save cures).

G17 – The Chair Room        

Several old halberds and spears are hung on the wall.  The gatehouse here has crumbled partially, leaving a hole in the wall; snow has blown inside, and the wind moans dully through the gap.  Set before the hole is a rocking chair made from human and animal bones, lashed together with sinews, as if made for someone to look out into the bailey beyond.

3 halberds, 4 longspears, 1 very creepy chair.

G18 – Officer’s Quarters

This square chamber, with its larger bed, writing desk, and small shelf, could have been the quarters of the gatehouse’s commander.  This furniture is badly rotten, infested with a thick, brown mould.  It looks like there might be a few papers mixed in with the detritus.

The furniture has been infested with brown mould.

There is little to be found here, except that a loose stone in the wall can be removed (Perception DC 22 to find).  Inside is a small belt-pouch with 54 gp.

The papers are mostly logs for the gatehouse’s inventory of weapons, ammunition, rations, and the like.  There is also, however, a map of the gatehouse and 1d3 other random maps.

G19 – Scorched Archer’s Gallery

This archer’s gallery looks down on the drawbridge and forest below.  There are scorch marks about some of the arrow-slits.  A shrunken, bug-eyed thing resembling a malignant, deformed child lies in the middle of the gallery, a quarrel protruding from its throat from a crude crossbow trap near the ceiling.

This Goblin met its end from one of Grugnar’s traps.  It has 3 silver pieces and a crude dagger.

KONICA MINOLTA DIGITAL CAMERA

Page 11 of 13

Powered by WordPress & Theme by Anders Norén